The “Social ID” feature in the Baraka mobile app aggregates the user’s digital profile and personal identification data in a single window.
Through this section, users can quickly check their current status and personal details registered in the system.
Follow these simple steps to access your social ID information:
Step 1: Going to Profile Settings
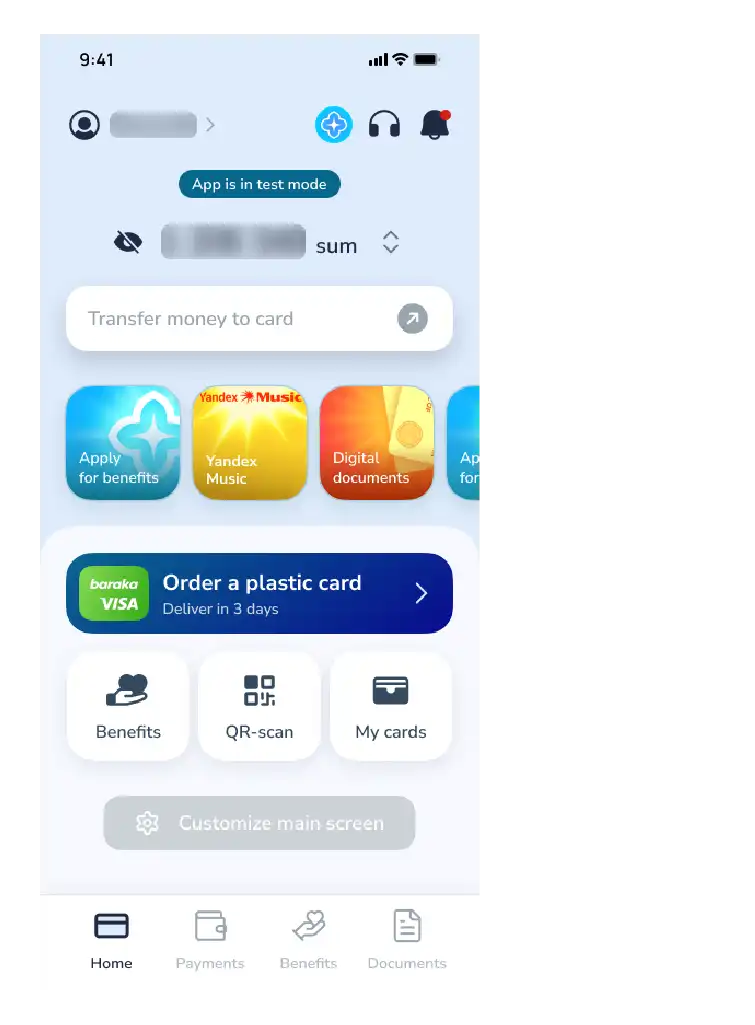
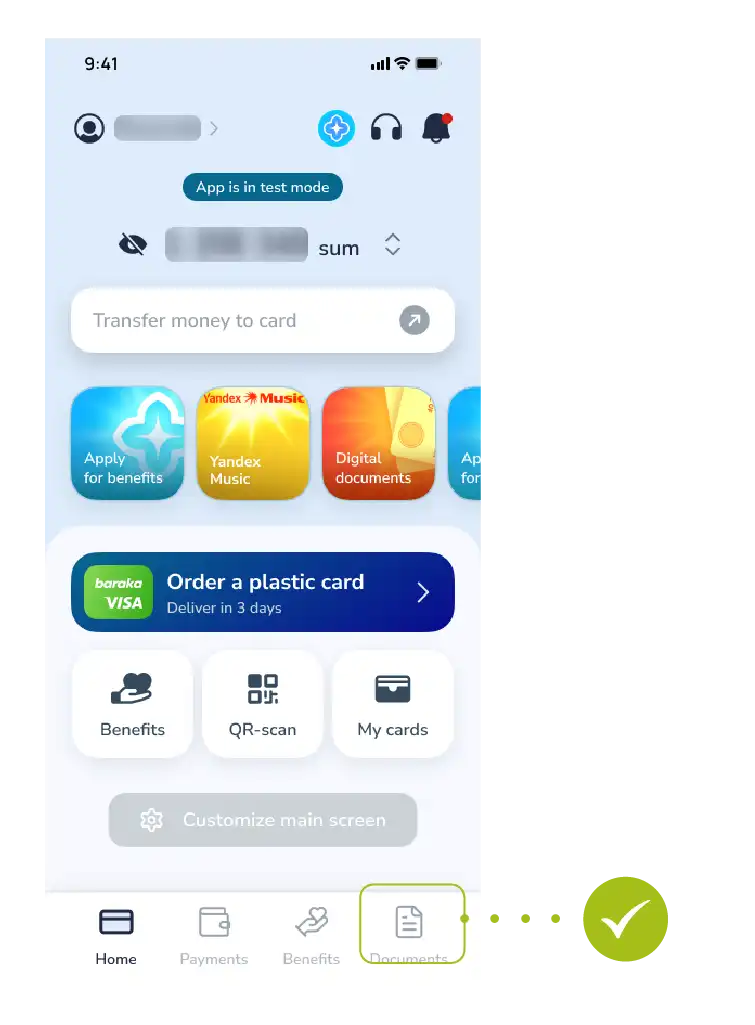
- Access the main menu of the app.
- Tap the section with your name and surname (personal profile icon) located in the upper-left corner of the screen.
Step 2: Selecting the Identifier
- Once the personal information window opens, find and select the “My Social Identifier” button from the menu items.
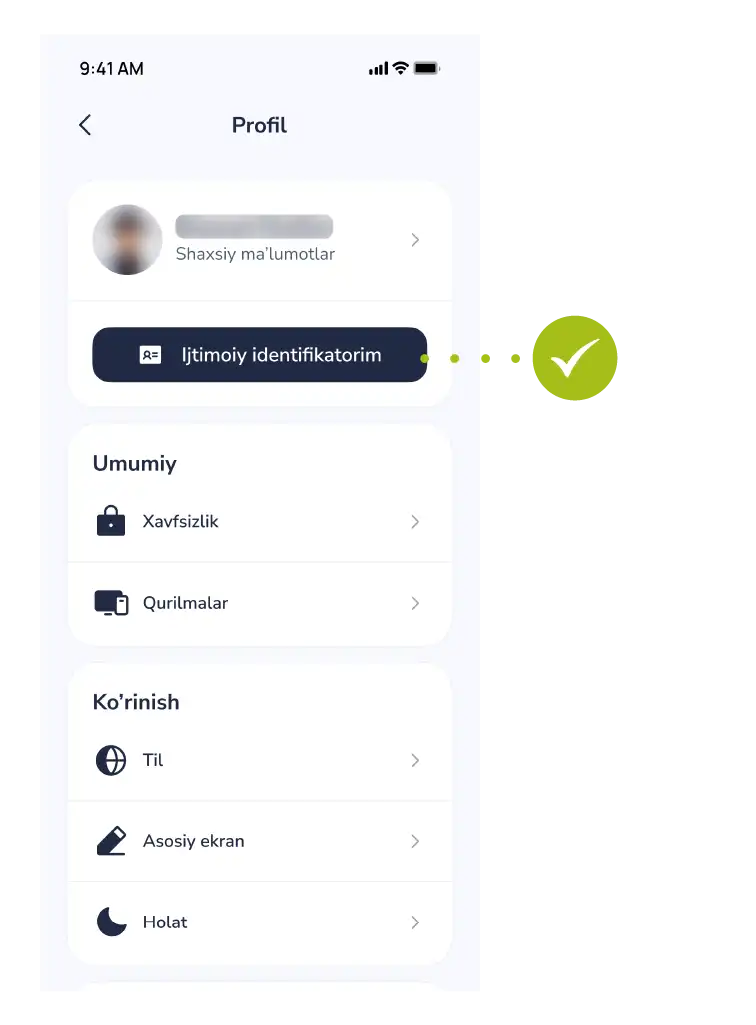
Step 3: Reviewing the Information
In this section, all the basic information relevant to you will be fully displayed:
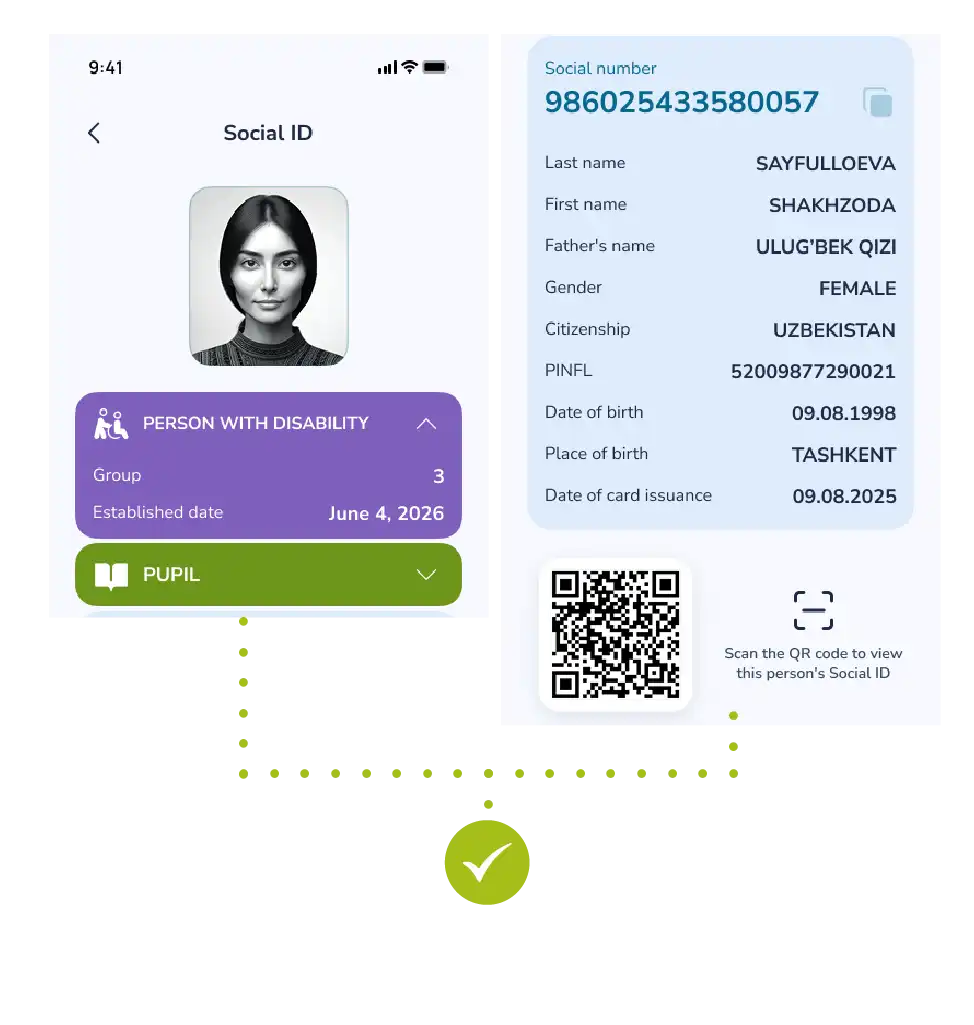
- Personal data of the user;
- Current identification status in the system;
- Other important social details.
Note: This information forms the basis of your digital identification in the banking system.
If you detect any inaccuracy in the information within this section, it is recommended to contact customer support immediately.
The Baraka mobile app provides users with the ability to store digital copies of their personal documents on a single platform.
This feature is designed to keep necessary information always at hand and to use it quickly in various banking transactions.
Follow this sequence to enter your personal documents into the system:
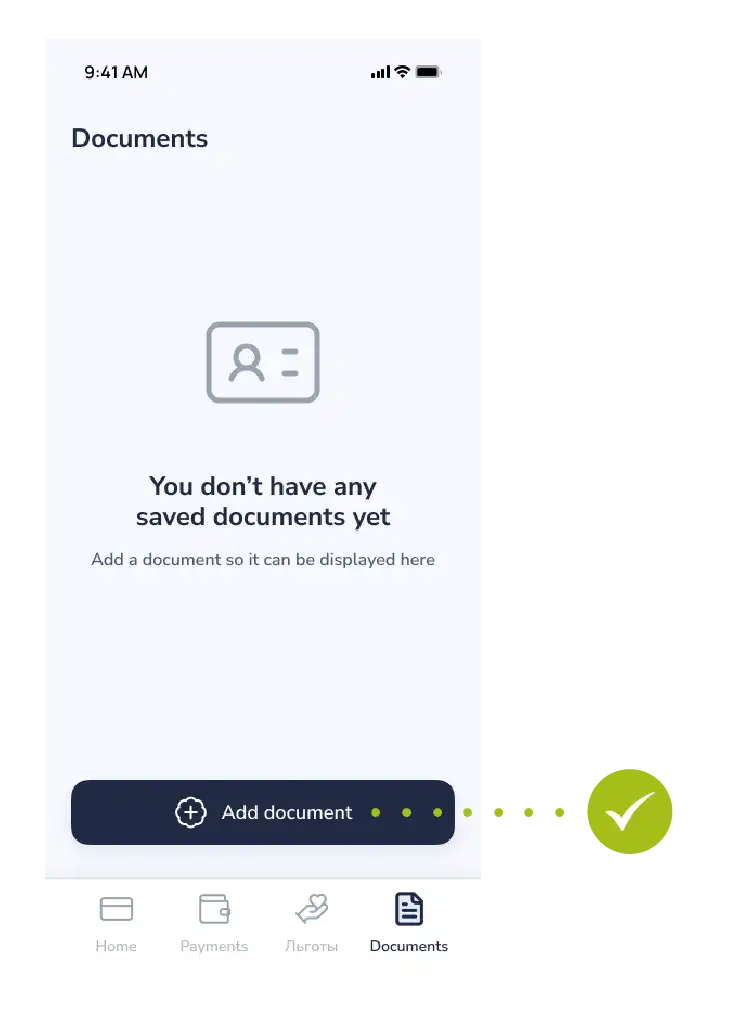
Step 1: Accessing the Documents Section
- Find and access the “My Documents” section from the main menu of the app.
- Here you can manage all your previously added documents.
Step 2: Adding a New Document
- Tap the “Add Document” button located at the bottom or top of the screen.
- After that, the system will present a list of documents that can be added.
Step 3: Selecting the Document Type
- Select the required document type from the list that opens.
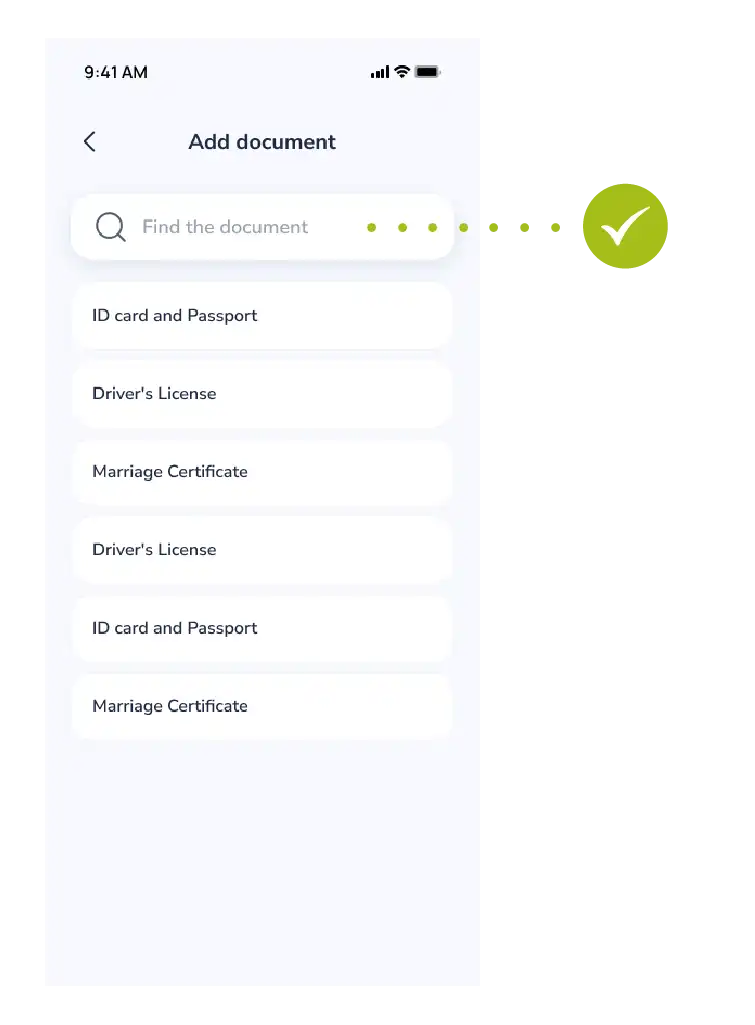
- For example: Civil passport of the Republic of Uzbekistan;
- ID card;
- Driver’s license;
- And other types of official documents.
Step 4: Finalizing the Process
- Once the selection is made (and information is entered if required), the system saves the document to the database.
- Now your document will appear in the “My Documents” list and will be available for use at any time.
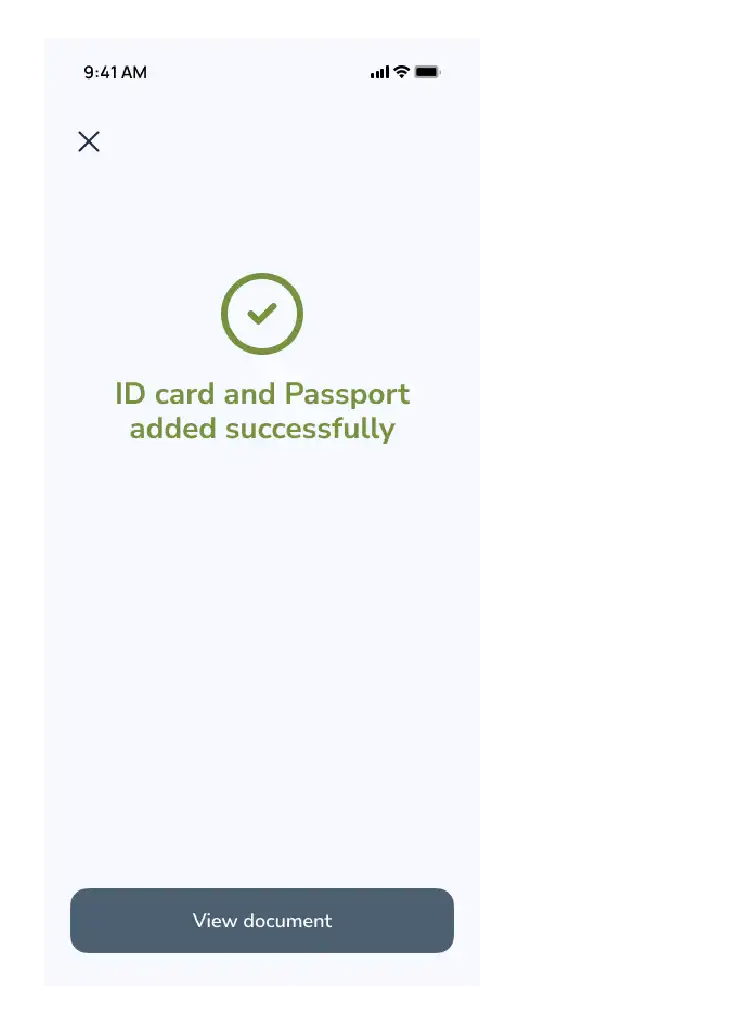
Security Note: Your document data is stored in an encrypted format, and its confidentiality is guaranteed by the system.
The process of contacting customer support through the Baraka mobile app is simplified, so the user does not need to enter the number manually.
The system allows making calls directly from the app for quick communication with an operator.
Follow these steps to contact the bank specialists:
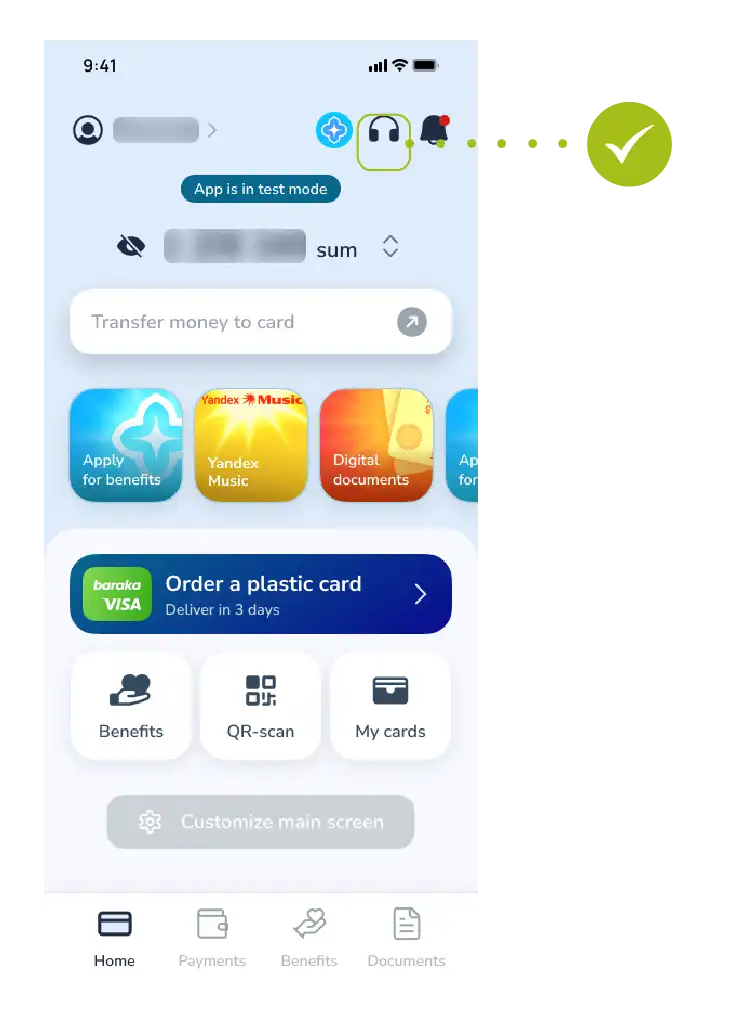
Step 1: Going to the Contact Section
- Tap the “Contact” button with the headphone icon located in the main menu of the app.
- This section includes all types of feedback channels.
Step 2: Selecting the Call Optionh
- Several options may appear in the menu that opens.
- Select the “Call” button for a live conversation with an operator.
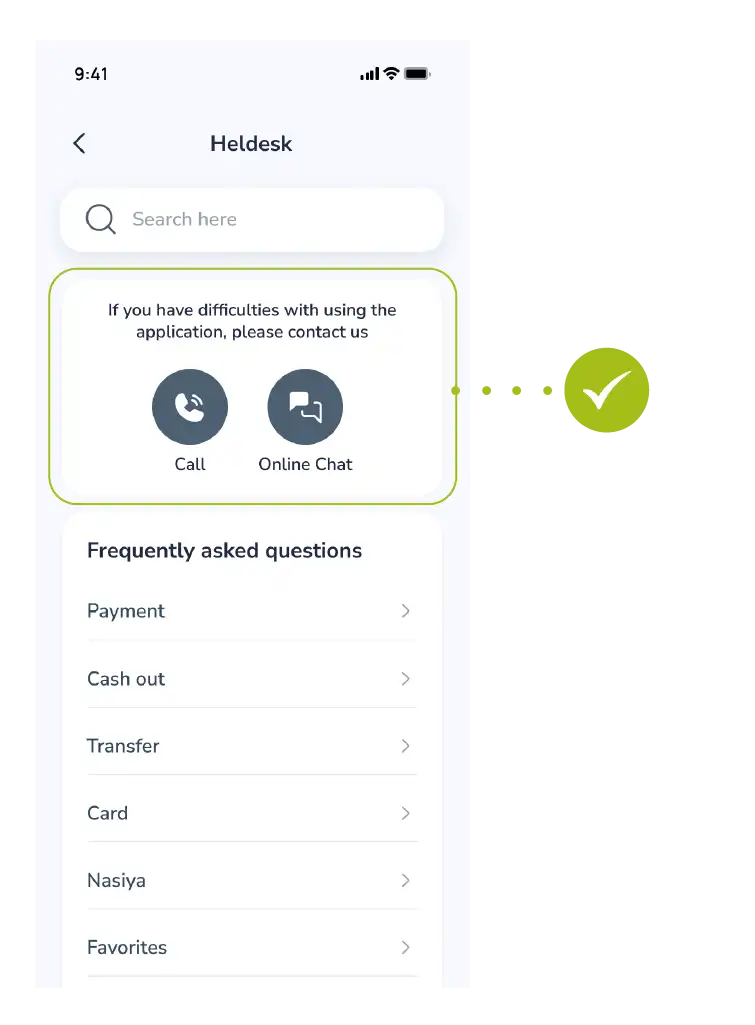
Step 3: Making the Call
- After tapping the button, the official call center number will automatically appear in your phone’s dialer window.
- You only need to press the call button to start.
For Reference: Through the call center, you can get help regarding card blocking, transaction discrepancies, or technical issues related to the app’s performance.
Saving transactions completed through the Baraka mobile app as a template allows you to perform subsequent payments even faster and more conveniently.
This feature helps users save time by eliminating the need to re-enter details for regular payments.
Creating saved payments for regular services is carried out in the following steps:
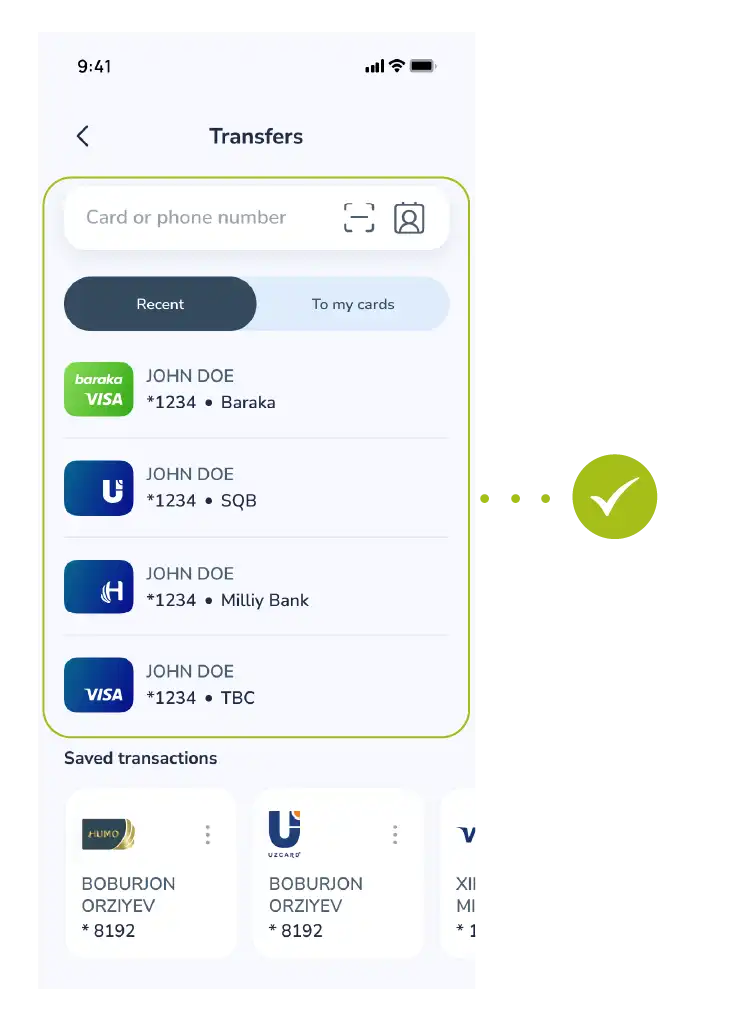
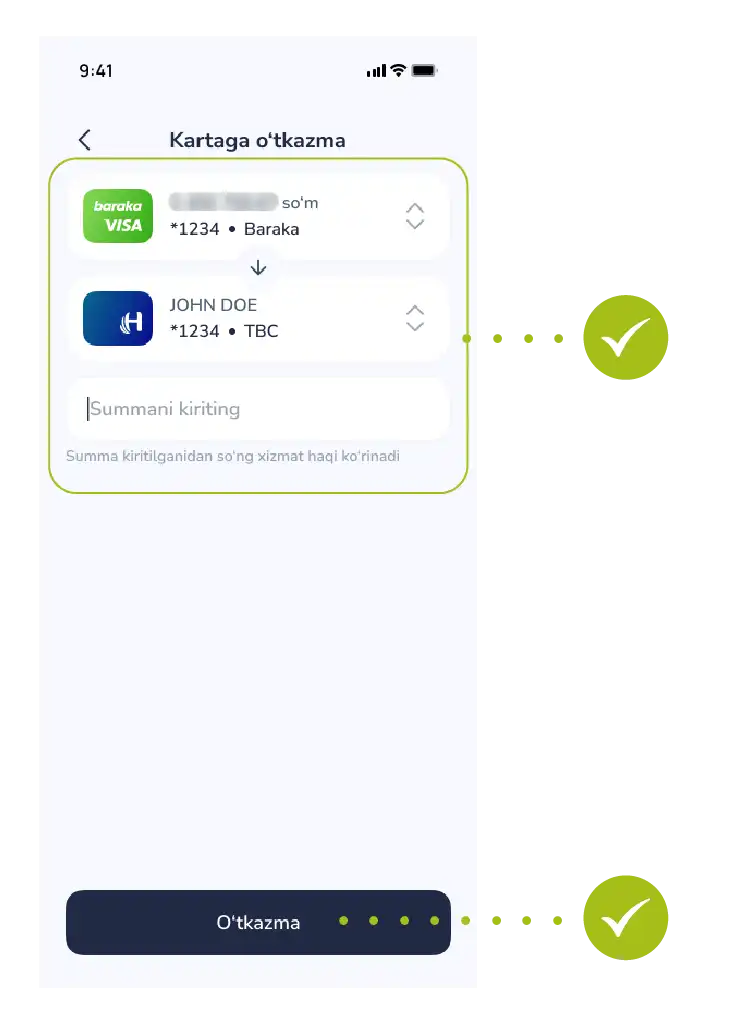
Step 1: Making the Payment
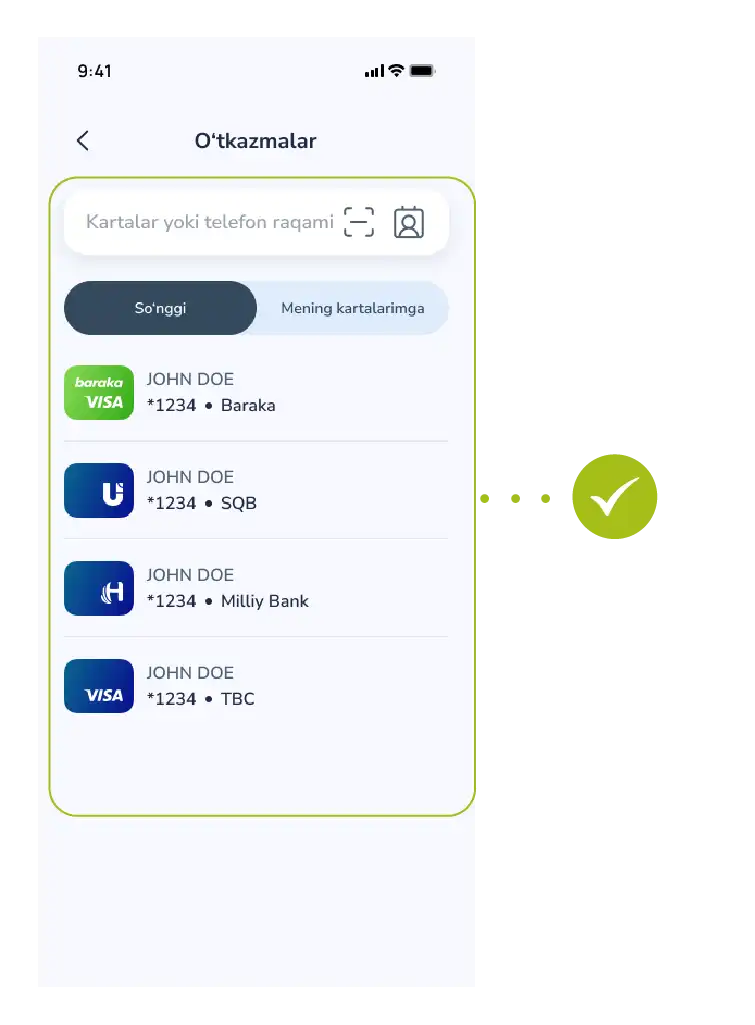
- Access the “Payments” section in the main menu.
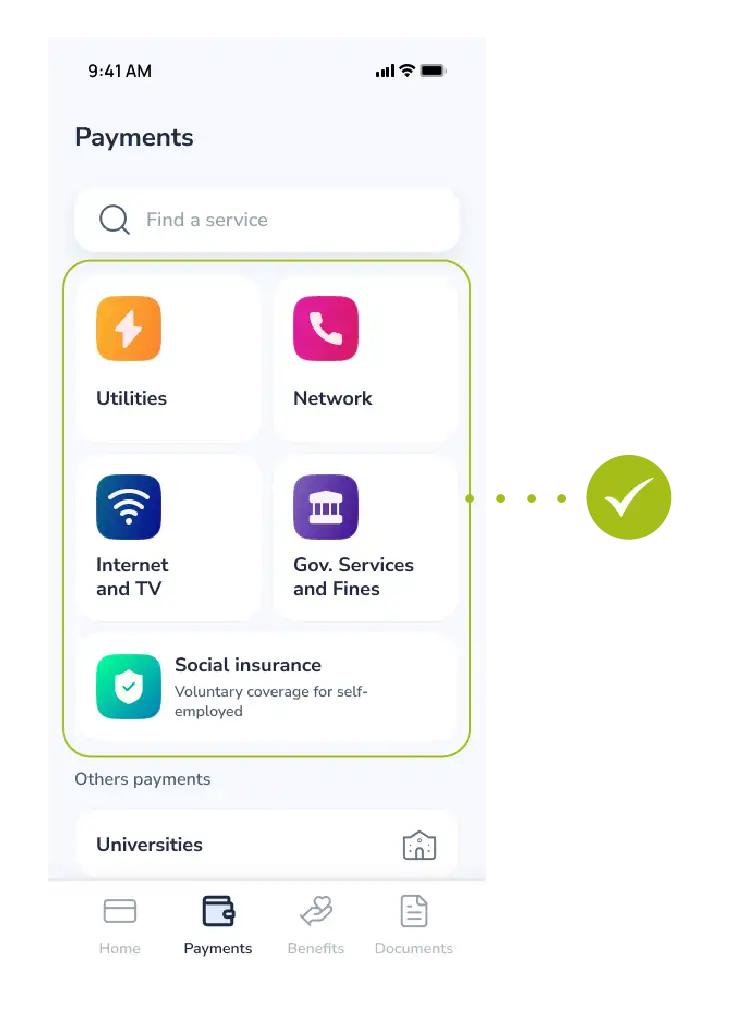
- Select the required type of service (Internet, mobile communication, utilities, etc.).
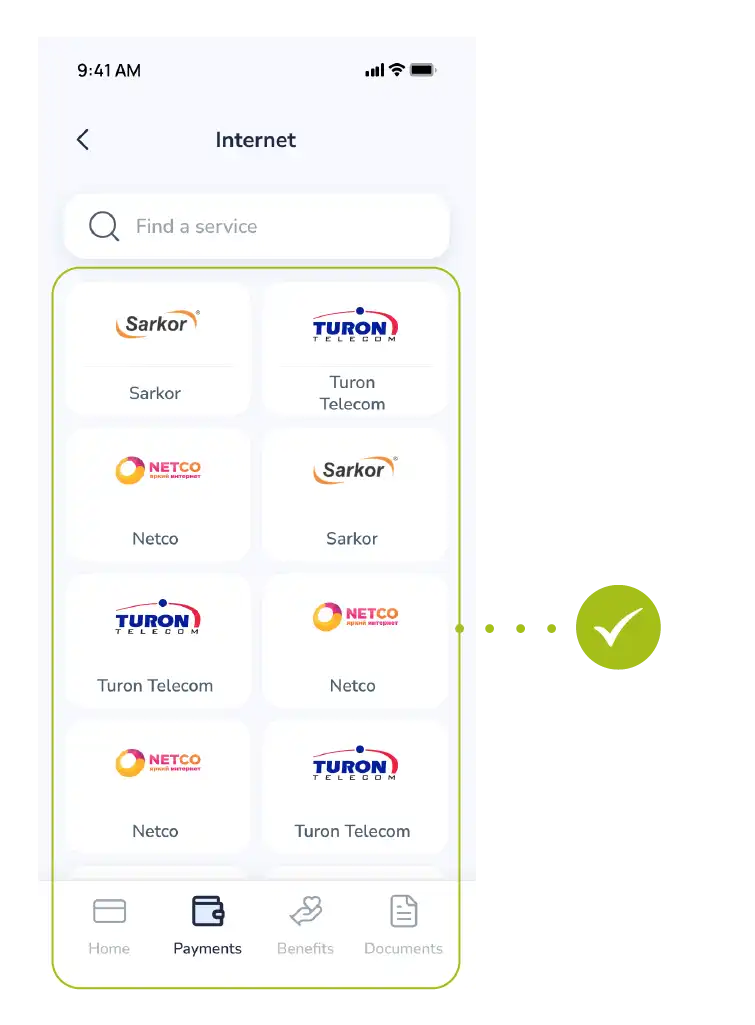
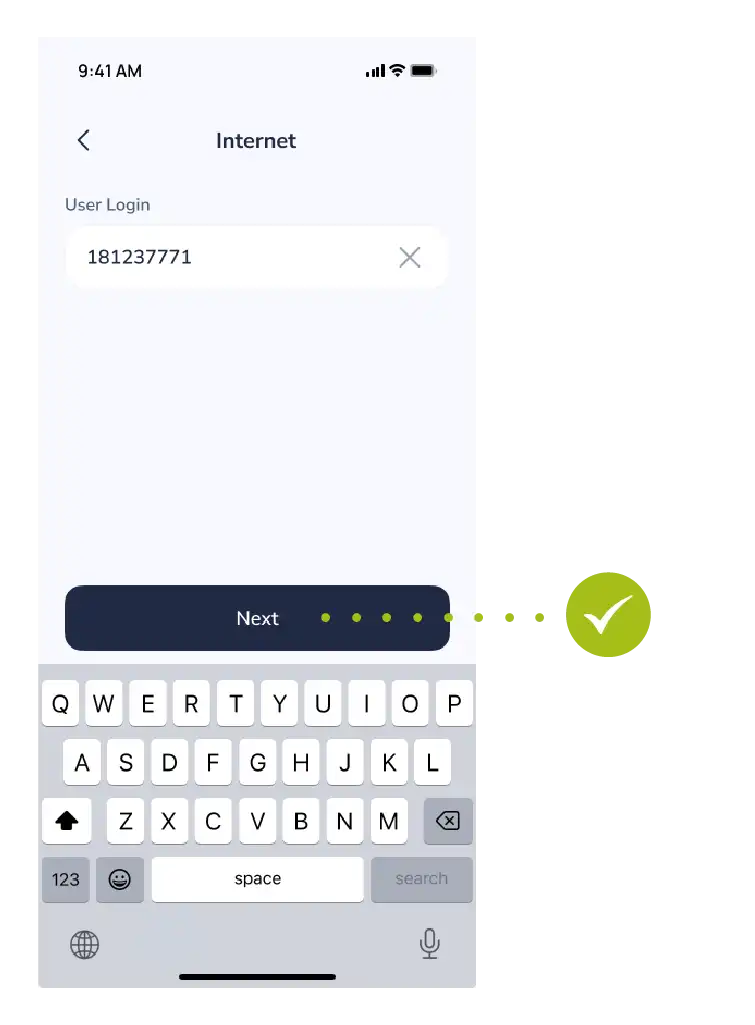
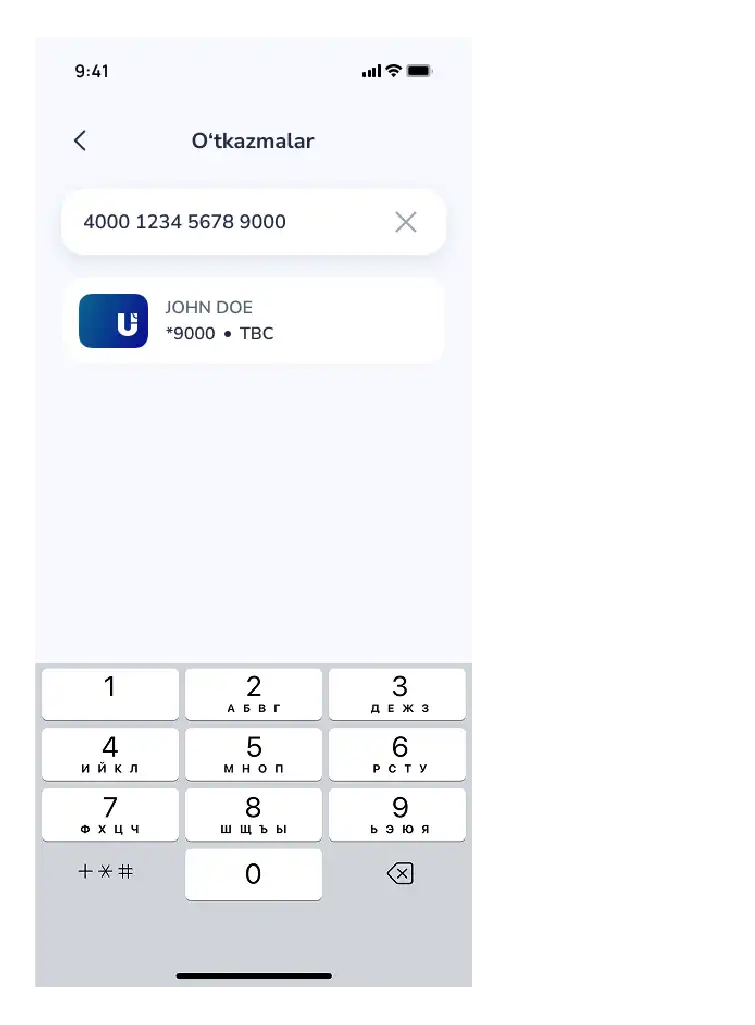
- Enter the relevant account number or subscriber code and tap the “Next” button.
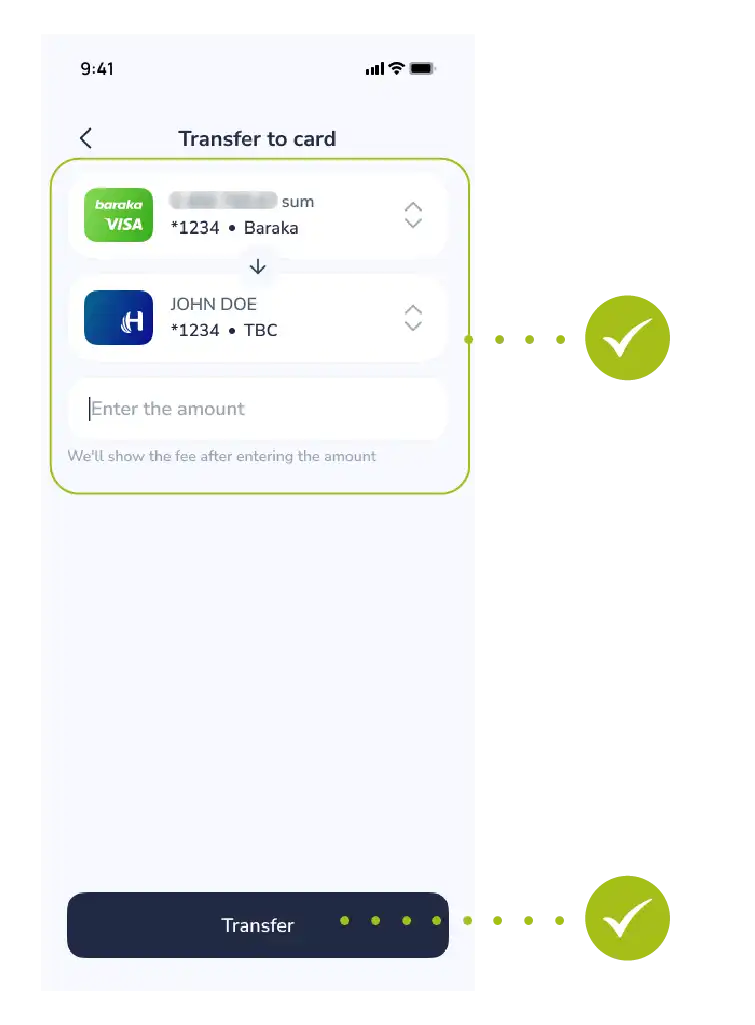
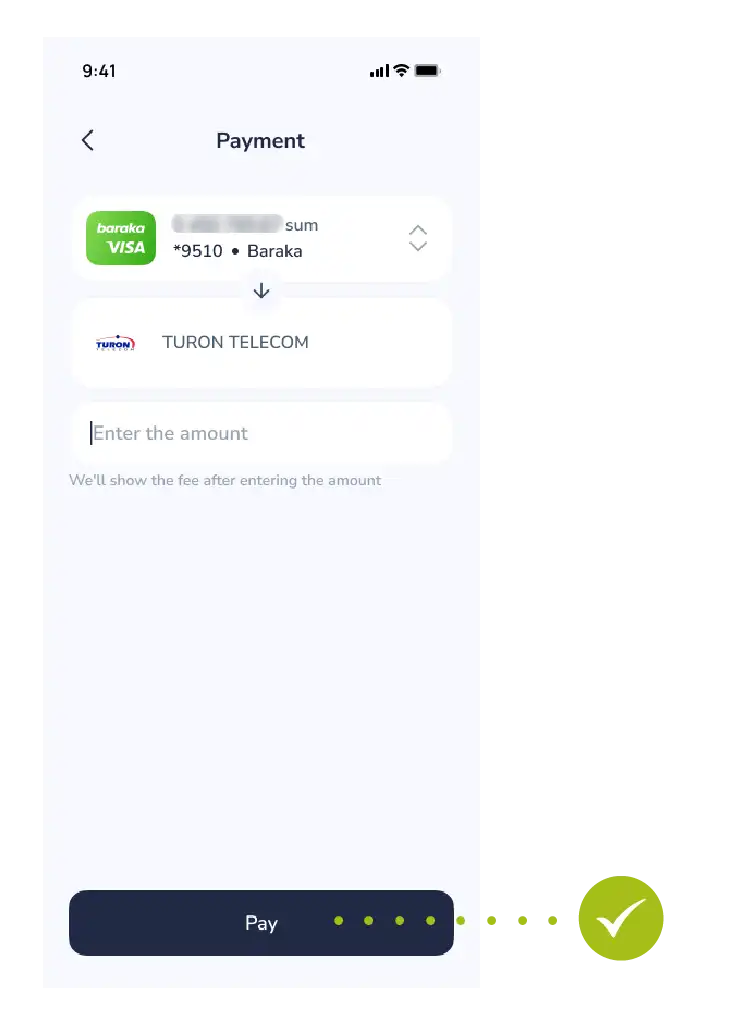
- The payment details will be displayed on the screen.

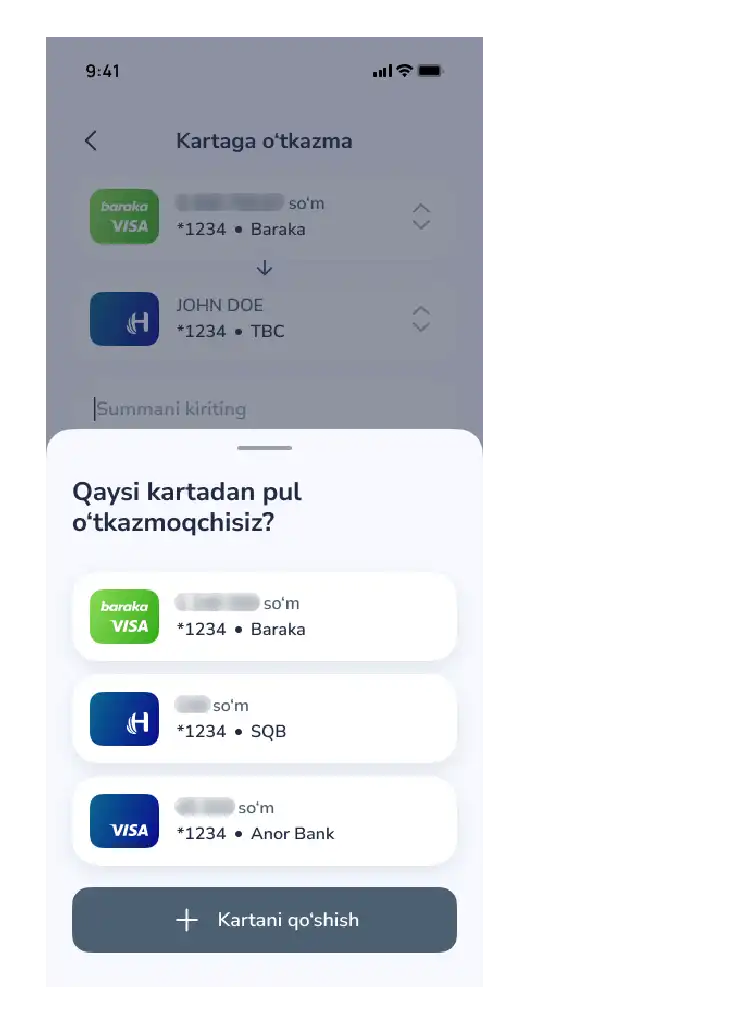
- Select the card from which the funds will be debited and complete the transaction by tapping the “Pay” button.
Step 2: Creating the Template
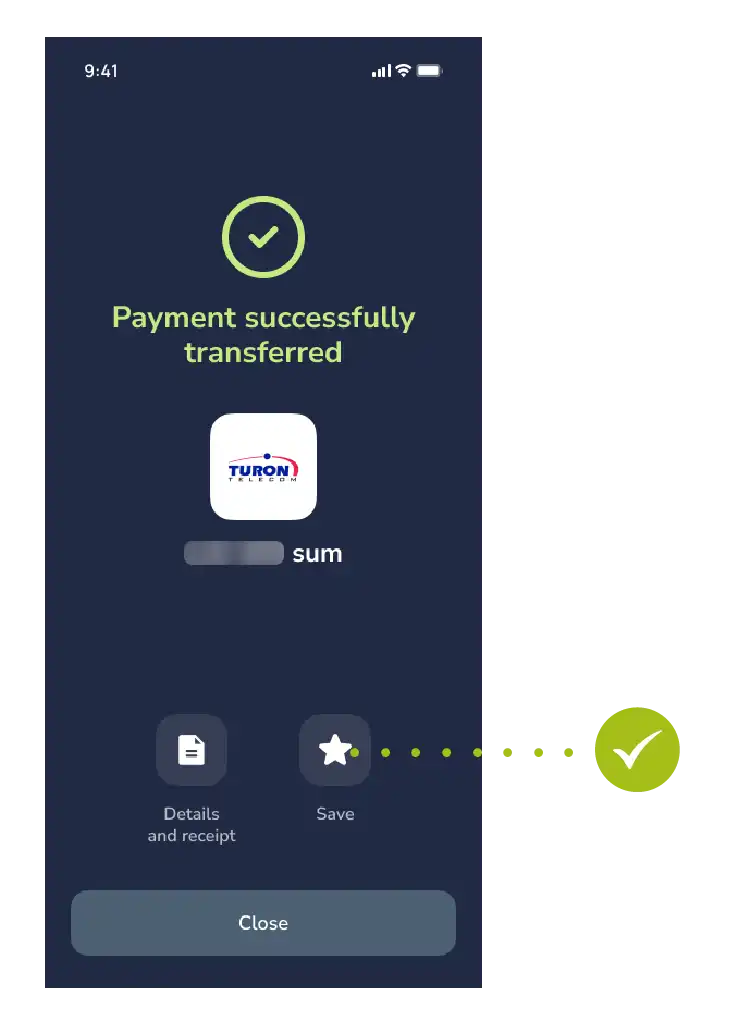
- Once the payment is successfully completed, tap the “Save” button that appears on the receipt or result window.
- In the window that opens, give this payment a name that is clear to you (for example: “Home Internet”, “My Number”, or “Electricity”).
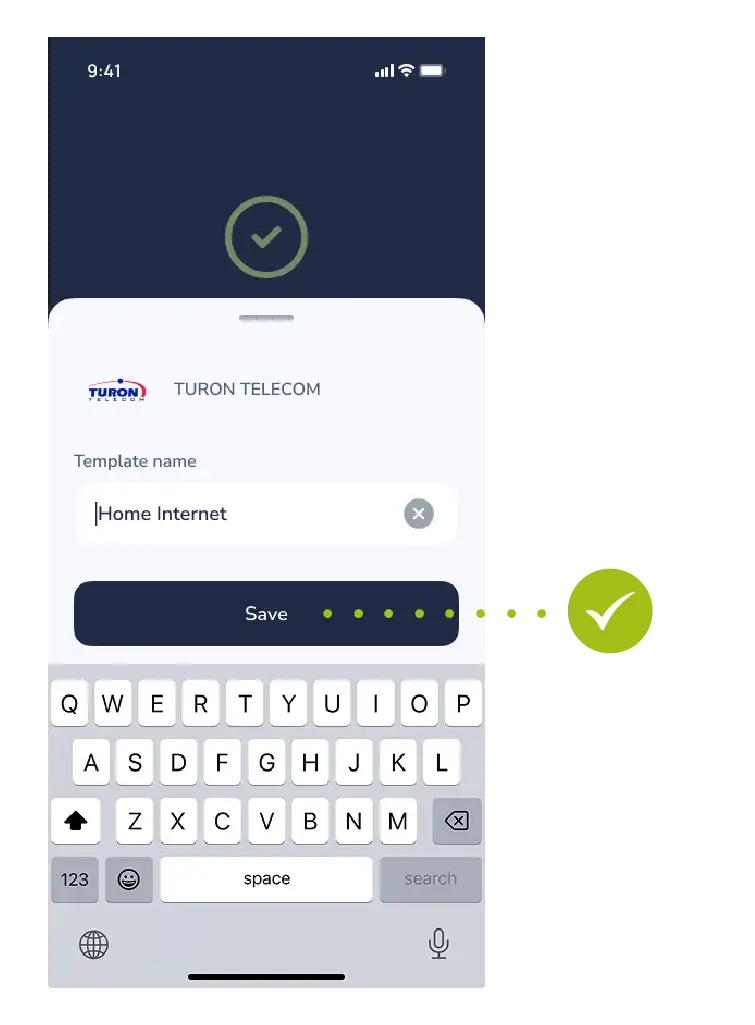
Step 3: Confirmation and Usage
- Once the name is entered, tap the “Save” button once again to complete the action.
- This completes the process.
Now this payment template will permanently appear in the “Saved Payments” section of the main menu.
For Reference: Next time you want to pay for the same service, you can use the “Saved Payments” section directly, without spending time searching for the service.
The Baraka mobile app allows you to view card details remotely, including the CVV code.
This process is protected by high-level security measures and includes a function to save the details to your device.
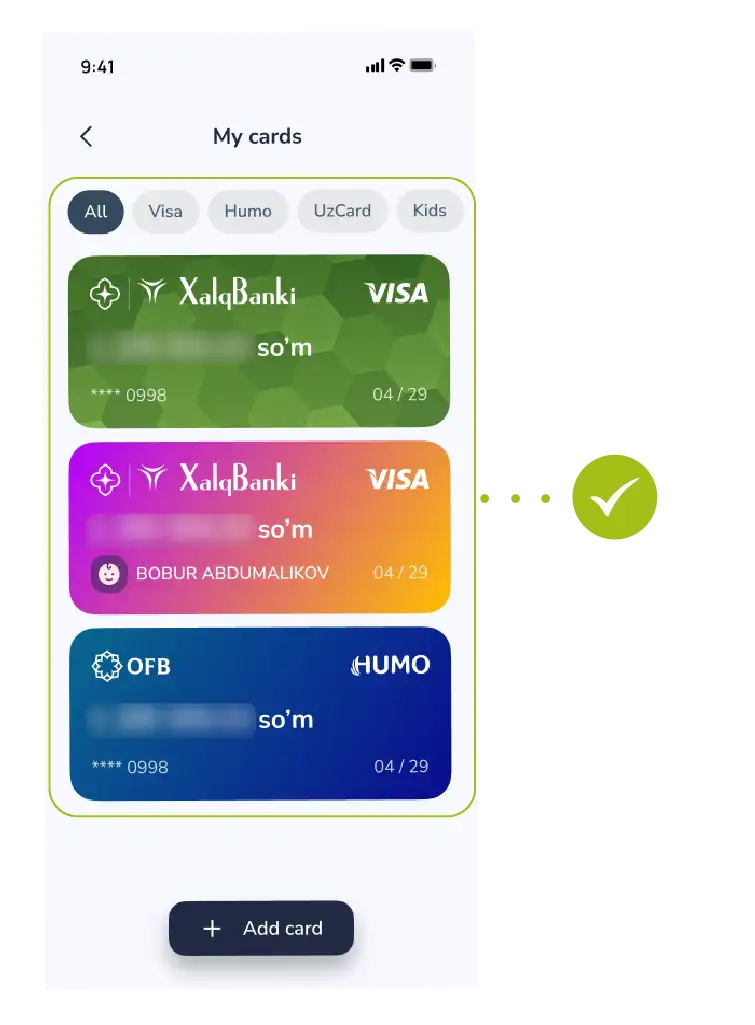
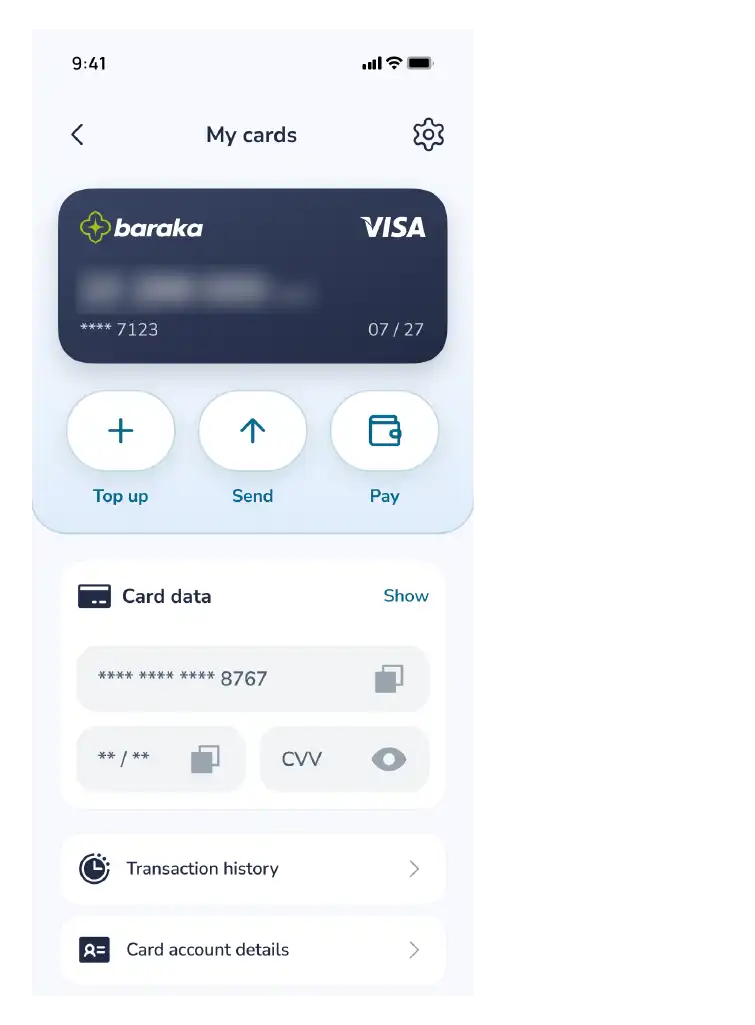
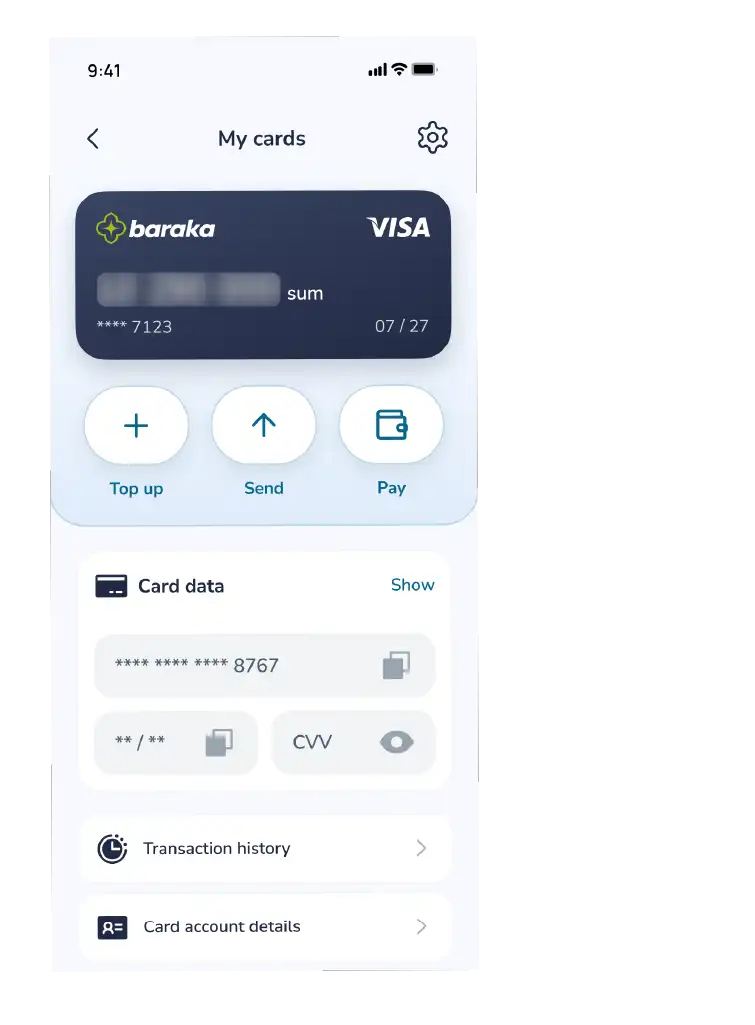
Step 1: Accessing Card Settings
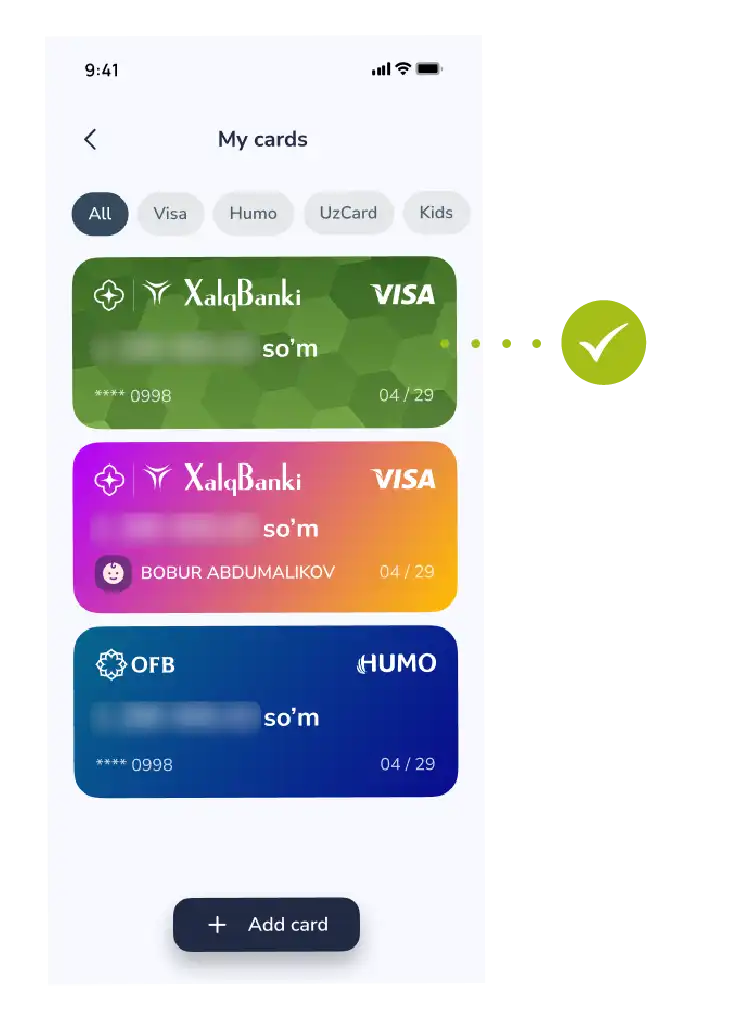
- Go to the “My Cards” section on the main screen of the app.
- Select the required Baraka card from the list.
- At this stage, you will see the overall balance and status of your card.
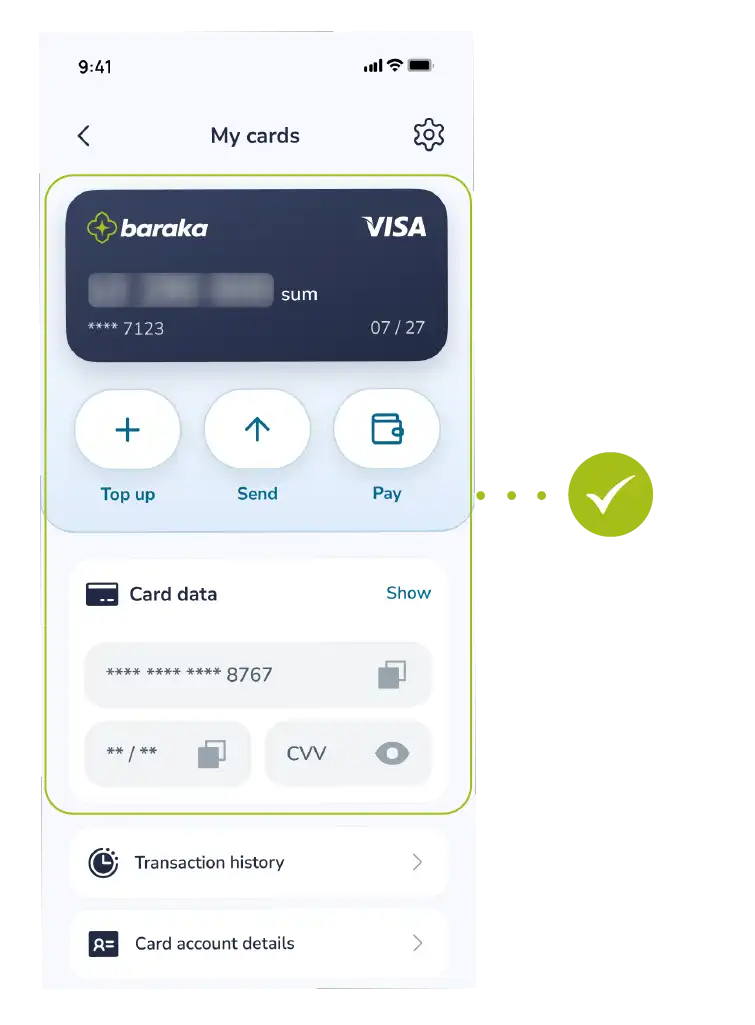
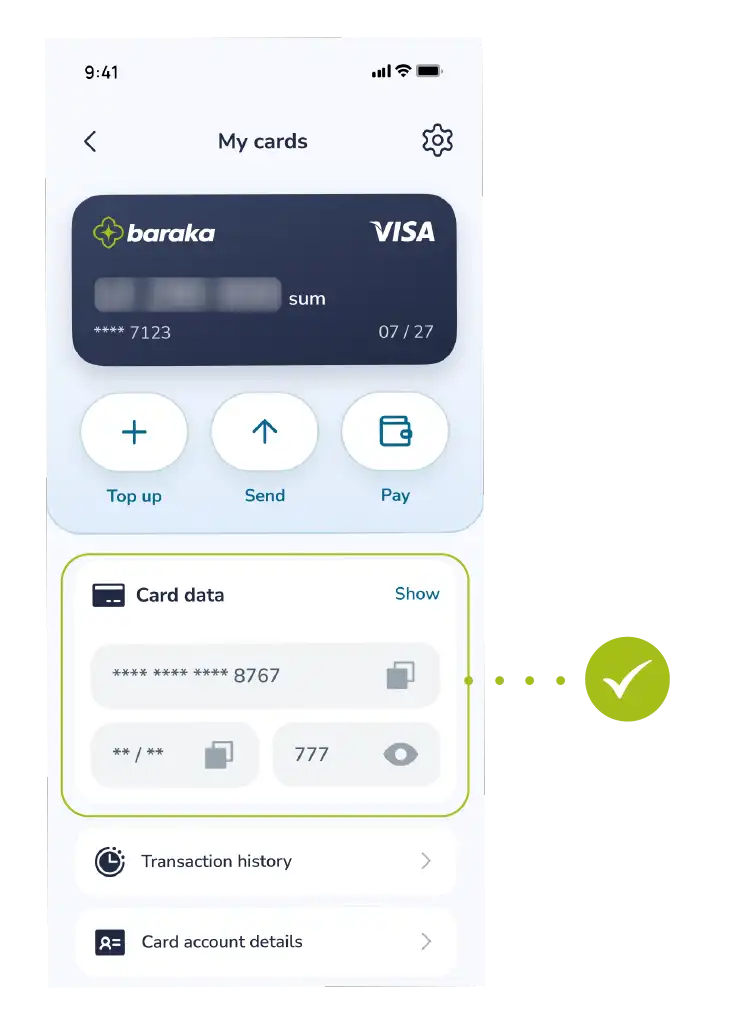
Step 2: Revealing the Information
- Tap the “Show” button (eye icon) next to the card image or in the details window.
- Initially, for security reasons, the CVV and a part of the card number will be hidden.
Step 3: Security Verification
- The system will verify your identity to display confidential information.
- Enter the one-time OTP code sent to your phone number into the designated field and confirm the action.
Step 4: Viewing and Saving Card Details
After confirmation, the following information will be fully displayed on the screen:
- Card number (16 digits);
- Expiration date;
- CVV/CVC code (3-digit secret code).
- If necessary, you can download this information as an image to your phone’s memory by tapping the “Save” button.
Important Note: Never share your CVV code and OTP passwords with third parties, even with those who introduce themselves as bank employees.
After saving the information to your phone, ensure that this image is protected from prying eyes.
The process of reissuing an existing card through the Baraka mobile app is fully digitized, allowing for identity verification and the selection of a convenient branch.
At the end of the process, the service fee is paid through remote payment systems.
Detailed Sequence of Actions:
Step 1: Creating the Application
- Access the “My Cards” section in the main menu of the app.
- Select your specific Baraka card from the list.
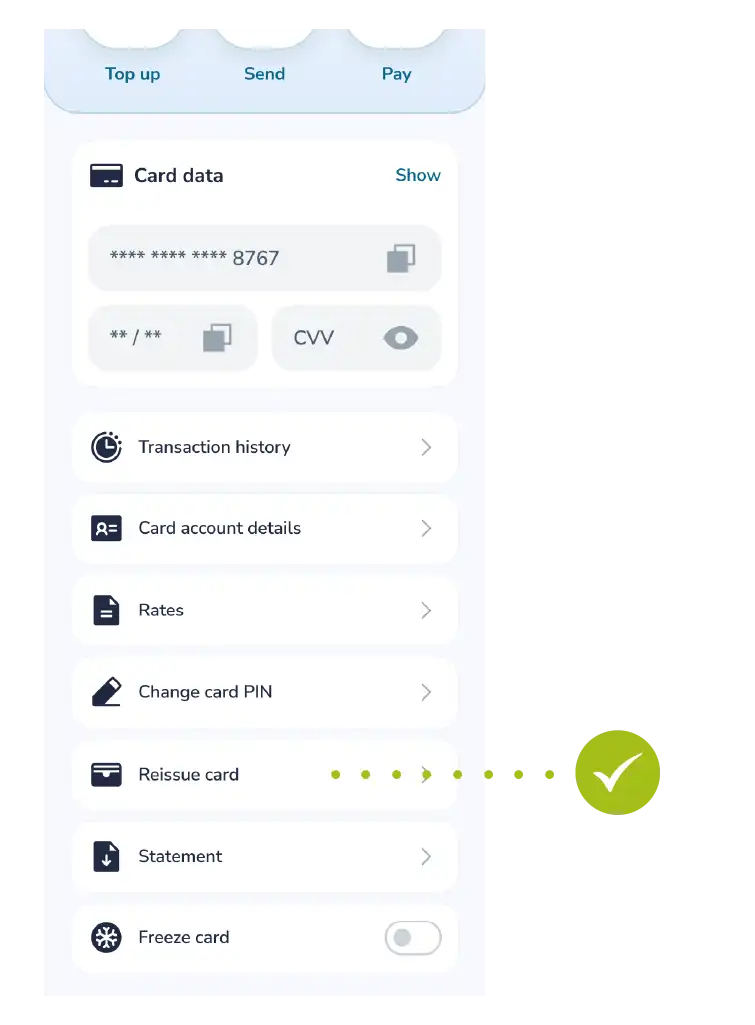
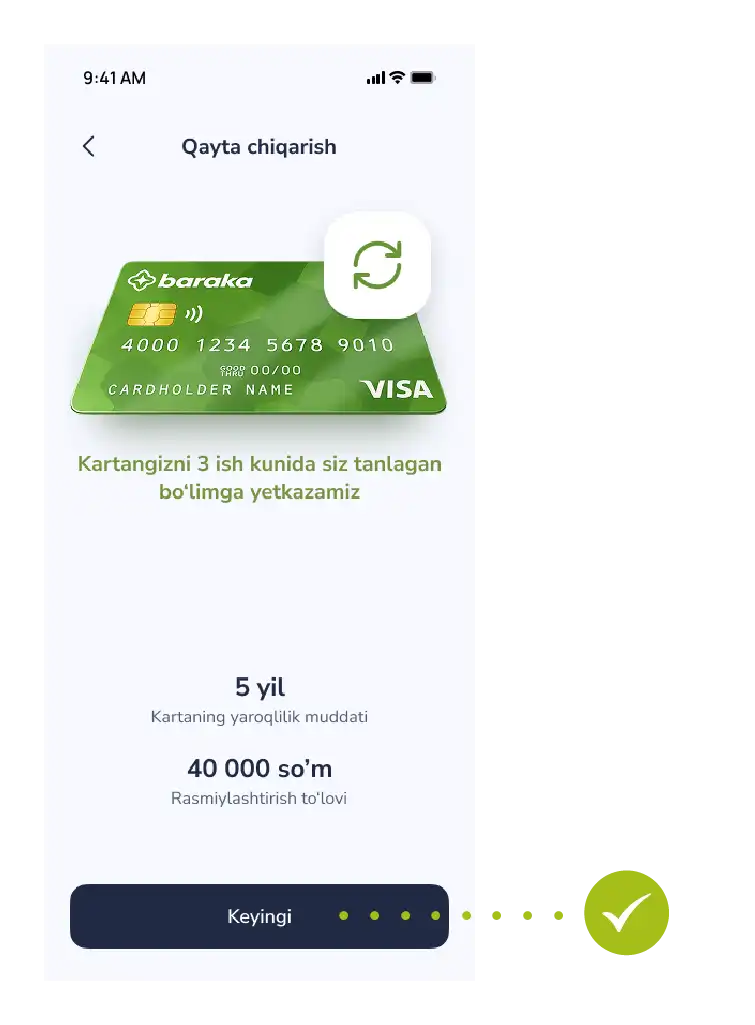
- Tap the “Reissue card” button, review the specified terms, and proceed by tapping the “Next” button.
Step 2: Identity Verification (Identification)
- Complete biometric identification in accordance with security requirements.
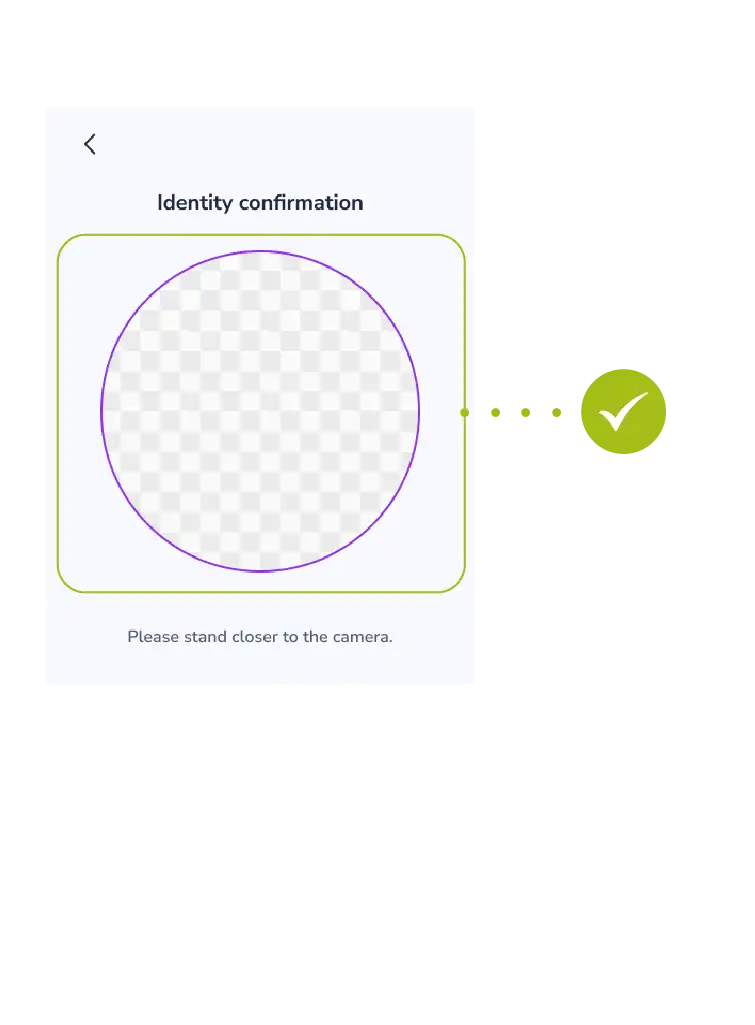
- Wait for the system to verify your identity.
- Enter the OTP code (one-time password) sent to your phone number.
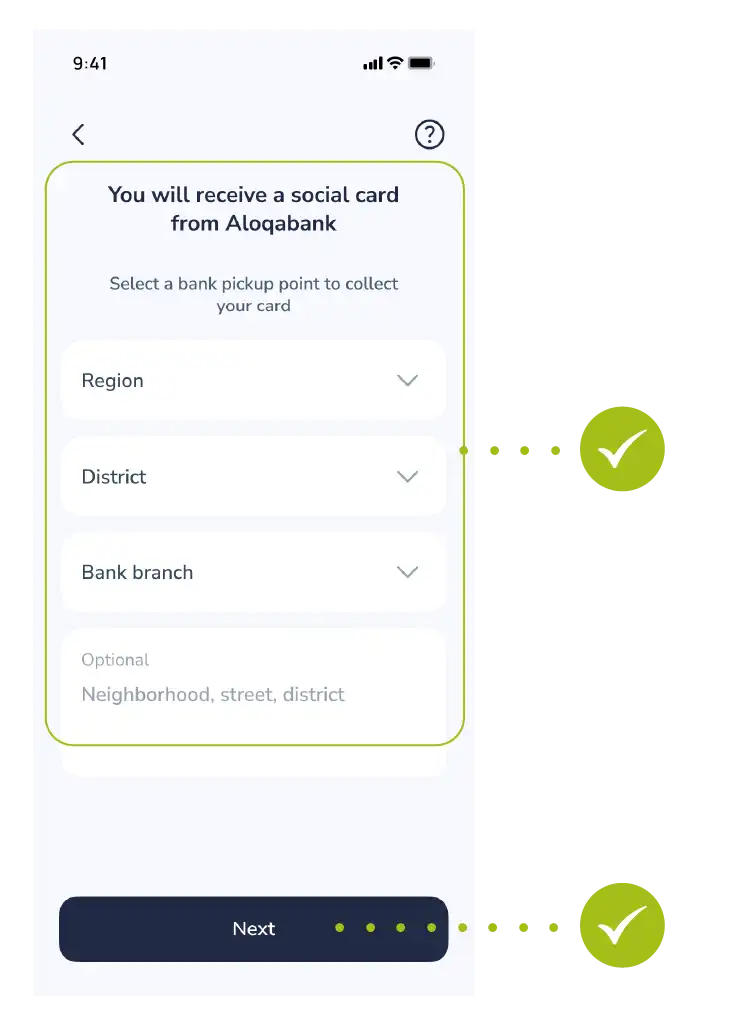
Step 3: Delivery and Verification
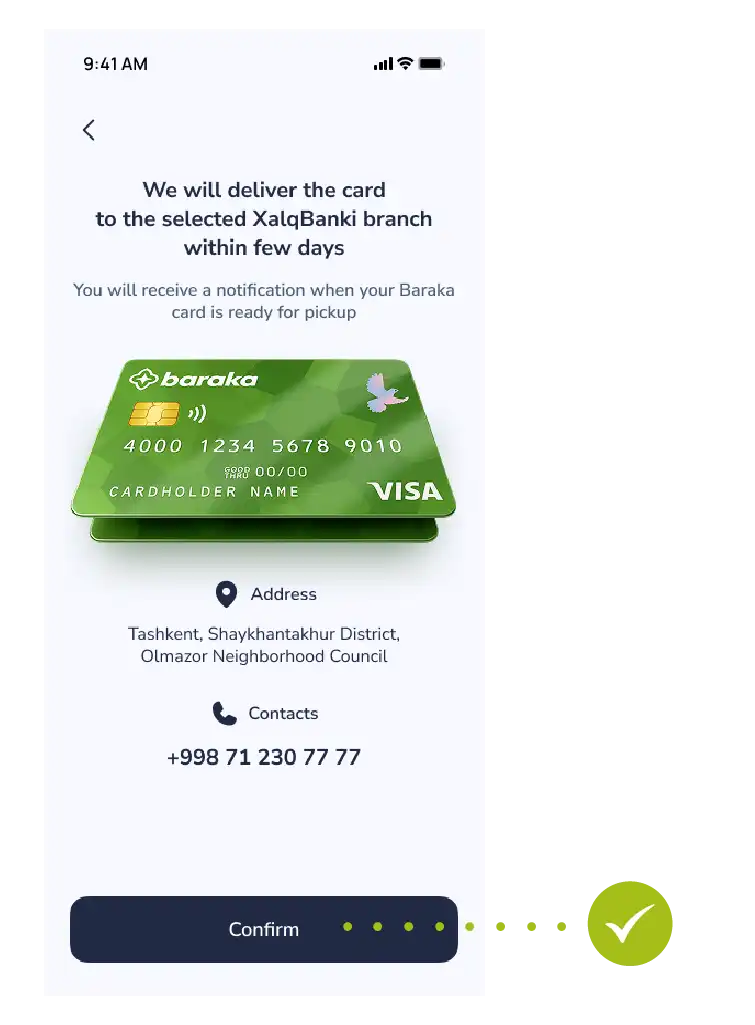
- Select the address of the nearest or most convenient bank branch to pick up your ready card.
- Review all the entered information again and tap the “Confirm” button.
Step 4: Making the Payment for the Service
Once your application is accepted, a special 9-digit code will be generated by the system.
You can make the payment using one of the following methods:
- Via external apps: Using Click or Paynet apps, or at Paynet branches (by entering the 9-digit code).
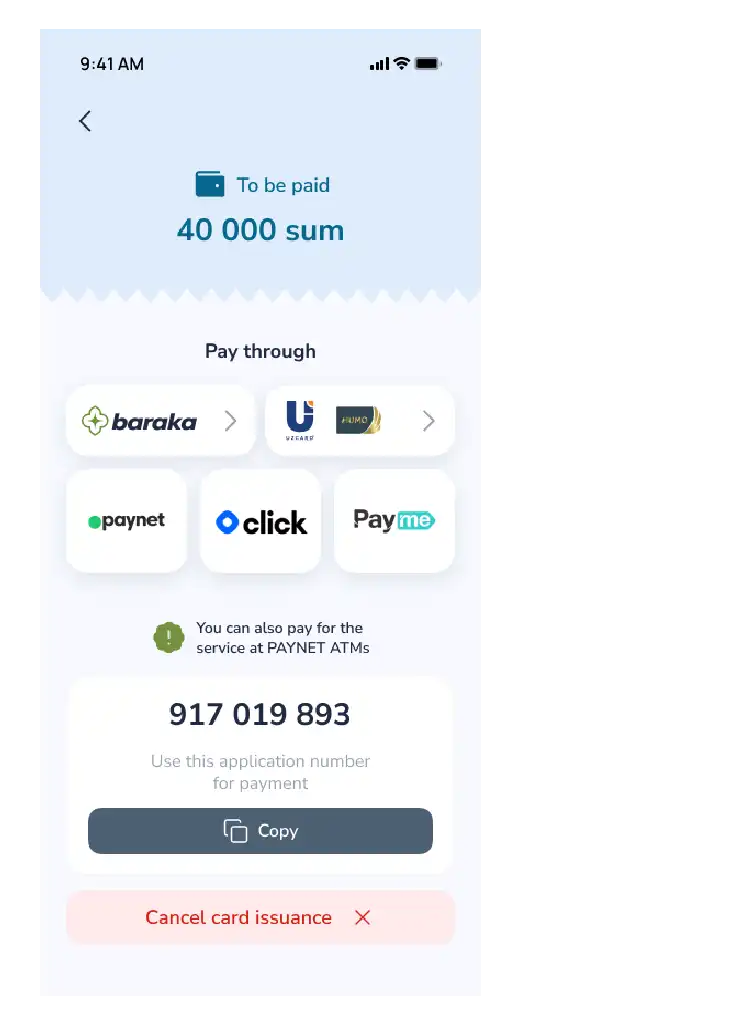
- Via the Baraka app: Go to the payment section and select “Baraka” as your payment method.
All the information will automatically be displayed on the screen.
Step 5: Make a payment

Eslatma: To‘lov muvaffaqiyatli yakunlangach, kartangiz ishlab chiqarishga yuboriladi va tanlangan filialda tayyor bo‘lganda sizga xabar beriladi.
This manual explains the procedure for remotely updating the security PIN of a “Baraka” card. Regularly changing or updating the PIN code is a fundamental requirement for ensuring the security of funds on the bank card. The process is protected by two-factor authentication (OTP), allowing the user to set a new code via the mobile app within minutes without visiting a bank branch.
Follow these steps to ensure card security and set a new PIN code:
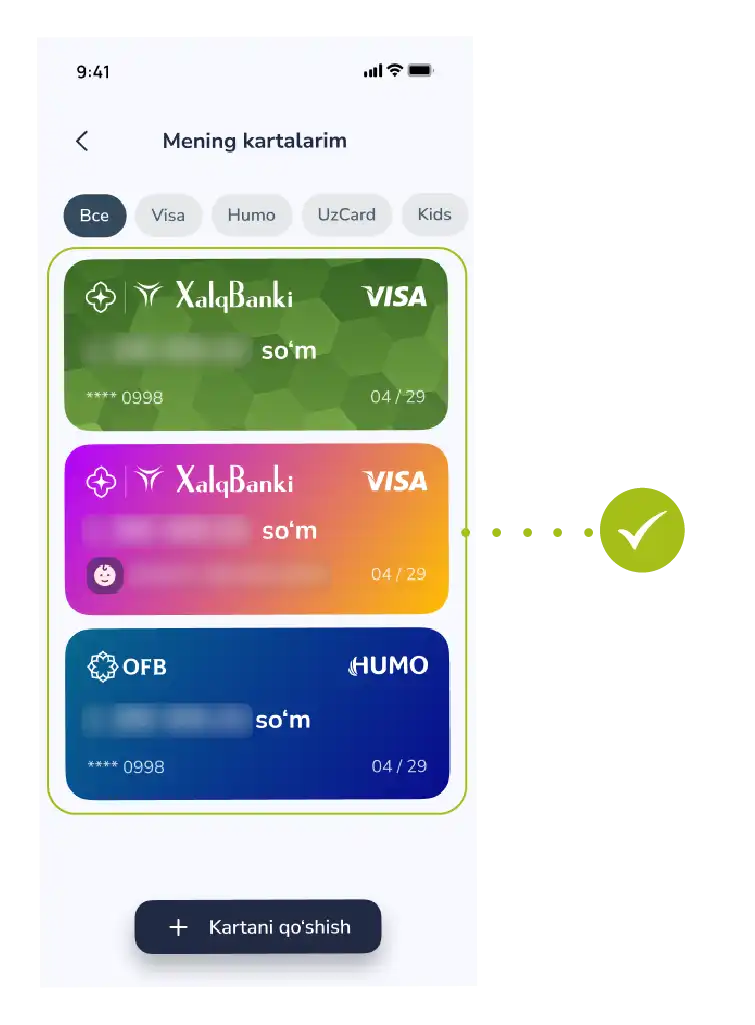
Step-1: Selecting the Card
- Go to the “My Cards” section from the bottom menu of the app and select your Baraka card whose PIN code you want to change from the list.
Step-2: Activating the Service
- In the card details window, tap the “Change PIN code” function.
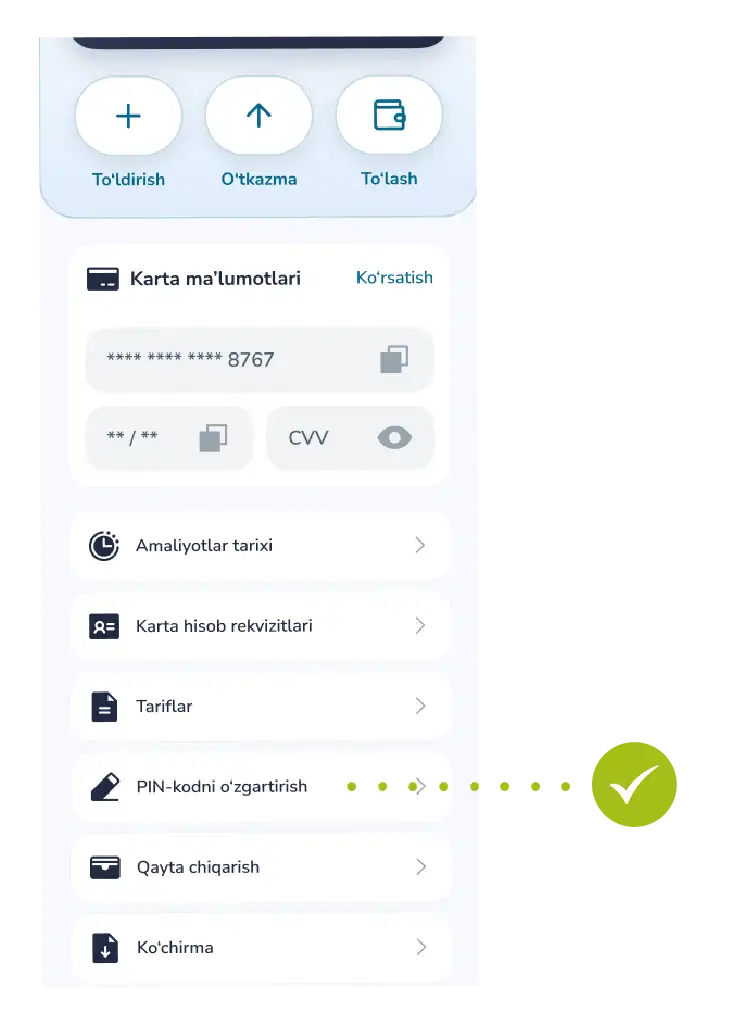
Step-3: Verifying Security
- To confirm your identity, enter the OTP code (one-time secret code) sent via SMS to your registered phone number into the designated field and confirm it.
Step-4: Creating a New Code
- Enter a new 4-digit PIN code that is convenient for you but difficult for strangers to guess.
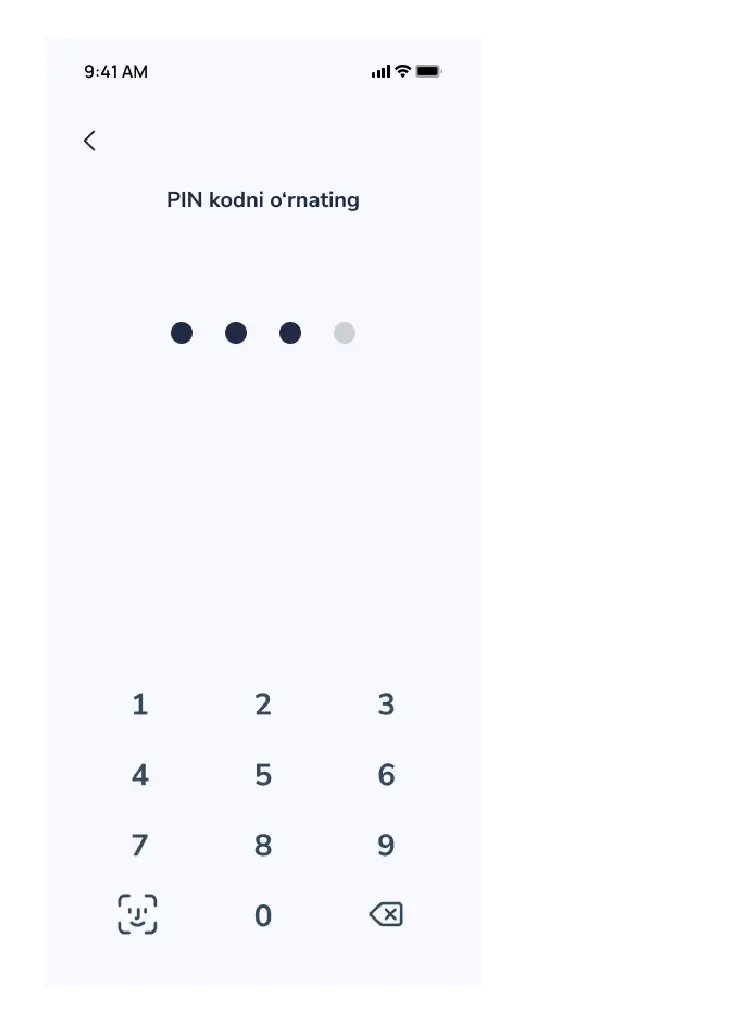
- Tip: It is recommended to avoid using simple numbers such as 1111 or 1234.
- Finalizing: After entering the new code, the system will automatically update it.
Step-5: Result
- A notification saying “Success! The PIN code has been successfully changed” will appear on the screen.
Now you can use the new code at payment terminals and ATMs.
This manual explains the procedure for remotely ordering a new bank card. The process involves selecting a bank, choosing a service point, and confirming the application. This service allows users to submit requests without visiting bank branches and includes a system for remote notification regarding the application status.
Follow this sequence to obtain a new bank card:
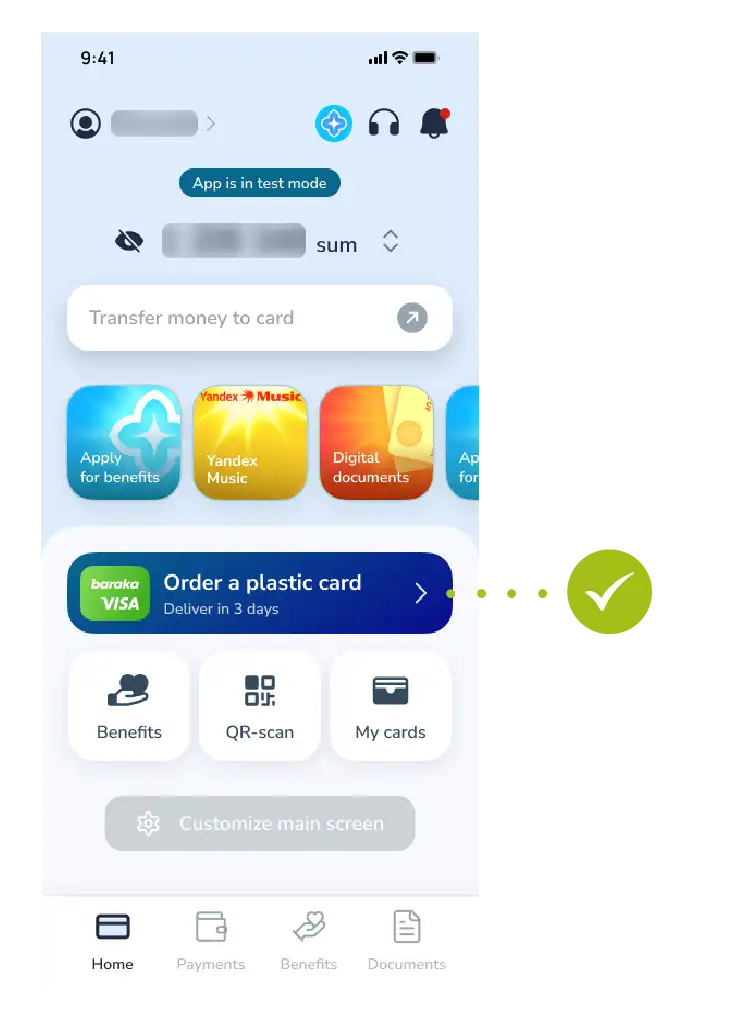
Step 1: Selecting the Service
- Tap the “Order a card” button located on the main page or in the relevant section of the app.
Step 2: Starting the Process
- Review the information and tap the “Next” button to continue.
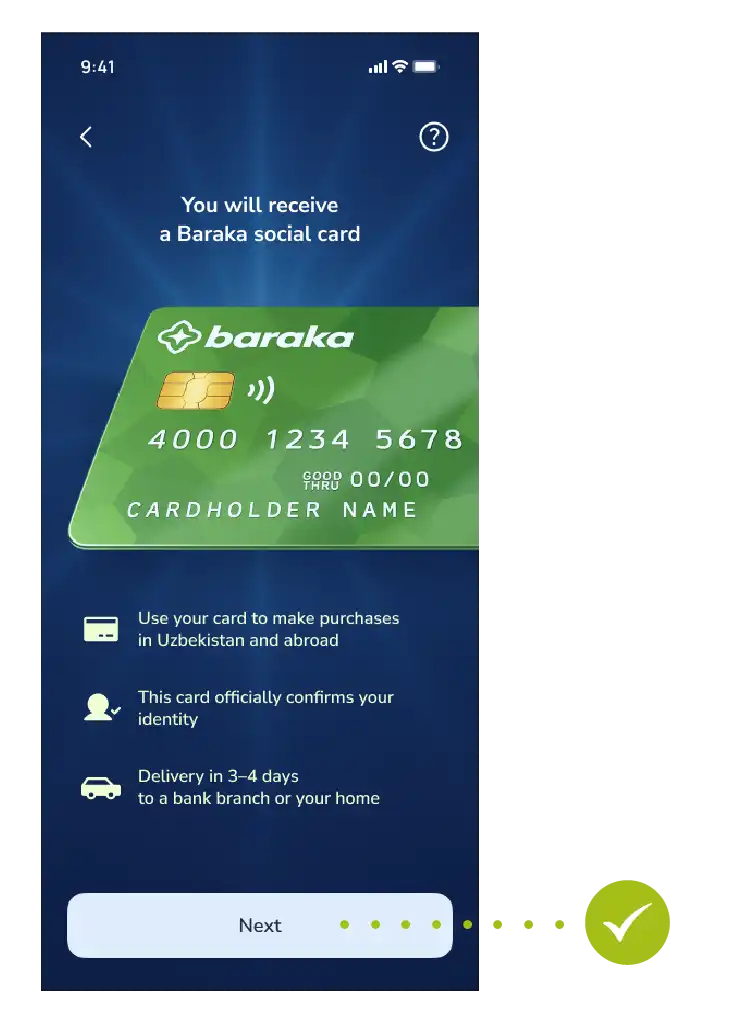
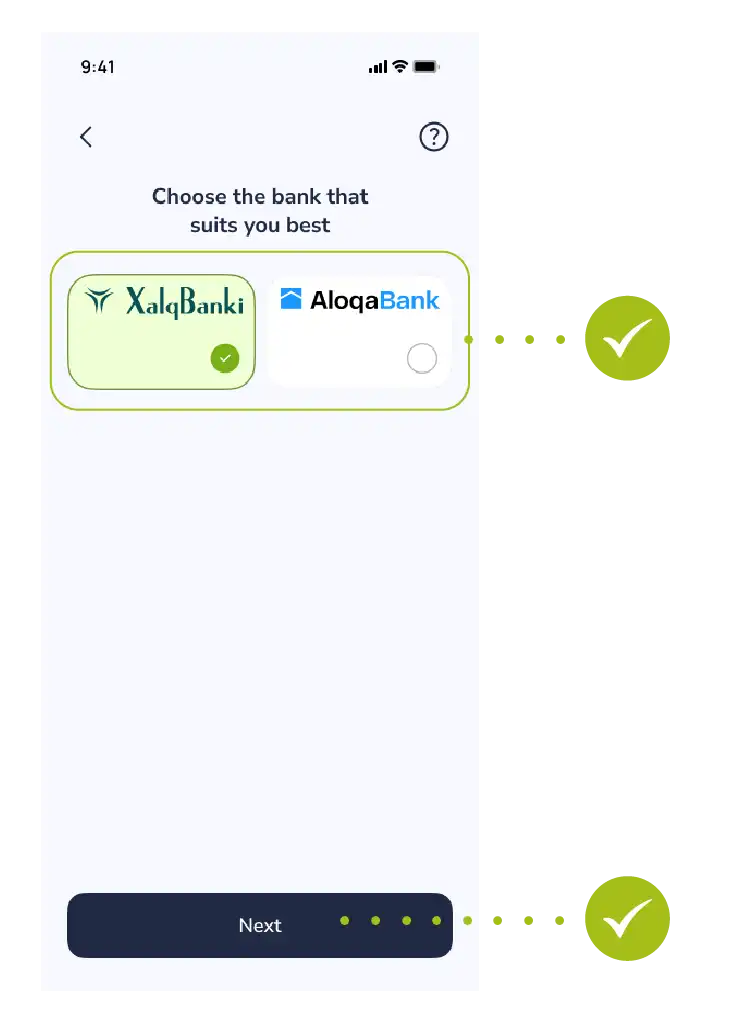
Step 3: Selecting the Bank
- Review the list of partner banks offered in the system and choose the bank whose terms suit you best.
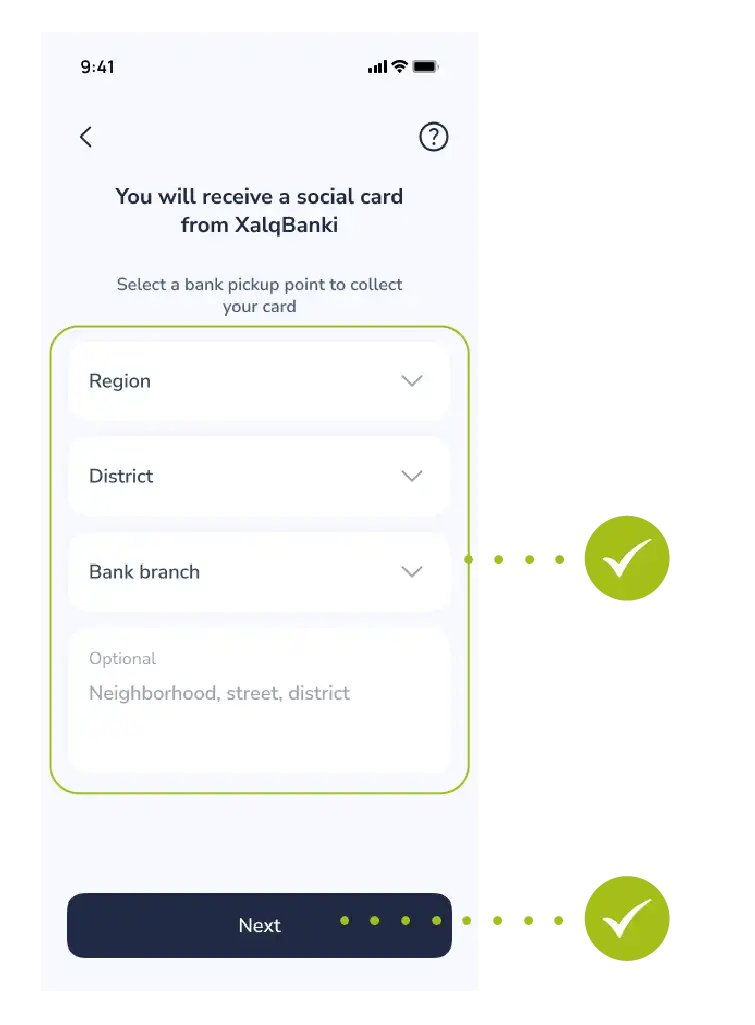
Step 4: Selecting the Branch
- Once the card is ready, select the nearest or most convenient bank branch from the list to pick it up.
- Make sure the selected details (bank and branch name) are correct and tap the “Next” button.
Step 5: Submitting the Application
- Once all steps are completed, tap the “Confirm” button to process the request.

Step 6: Selecting a Payment Method
After pressing the confirmation button, the system will automatically redirect you to the payment section. Choose a payment method that is convenient for you:
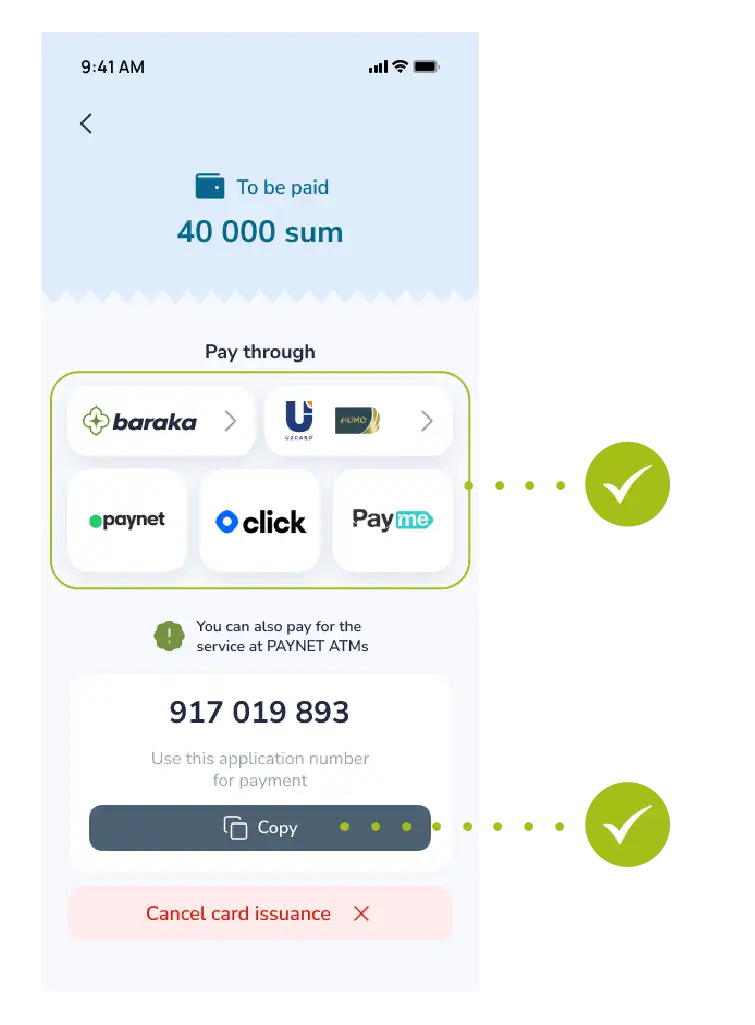
- Baraka card or Uzcard/Humo bank cards;
- Paynet, Click, or Payme electronic payment systems.
Useful Tip: If your chosen payment app (Click, Payme, or Paynet) is installed on your device (phone), the system will automatically switch to that app and open a ready-to-pay invoice.
Alternatively, you can pay in cash via PAYNET ATMs using the provided unique 9-digit ID number.
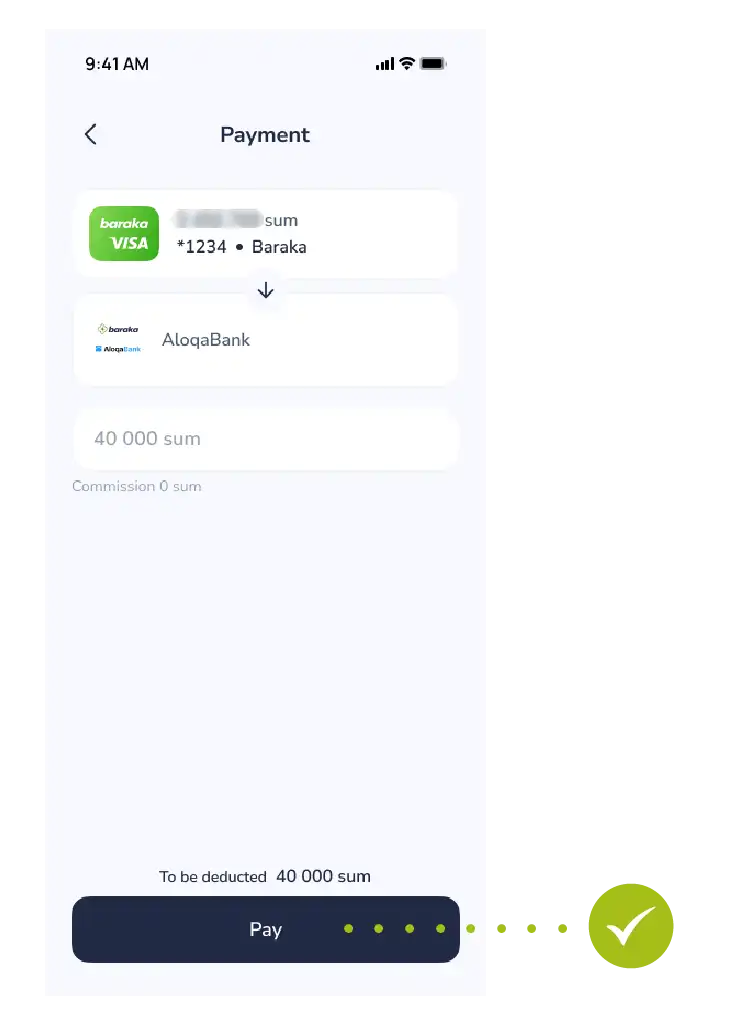
Step 7: Completing the Payment
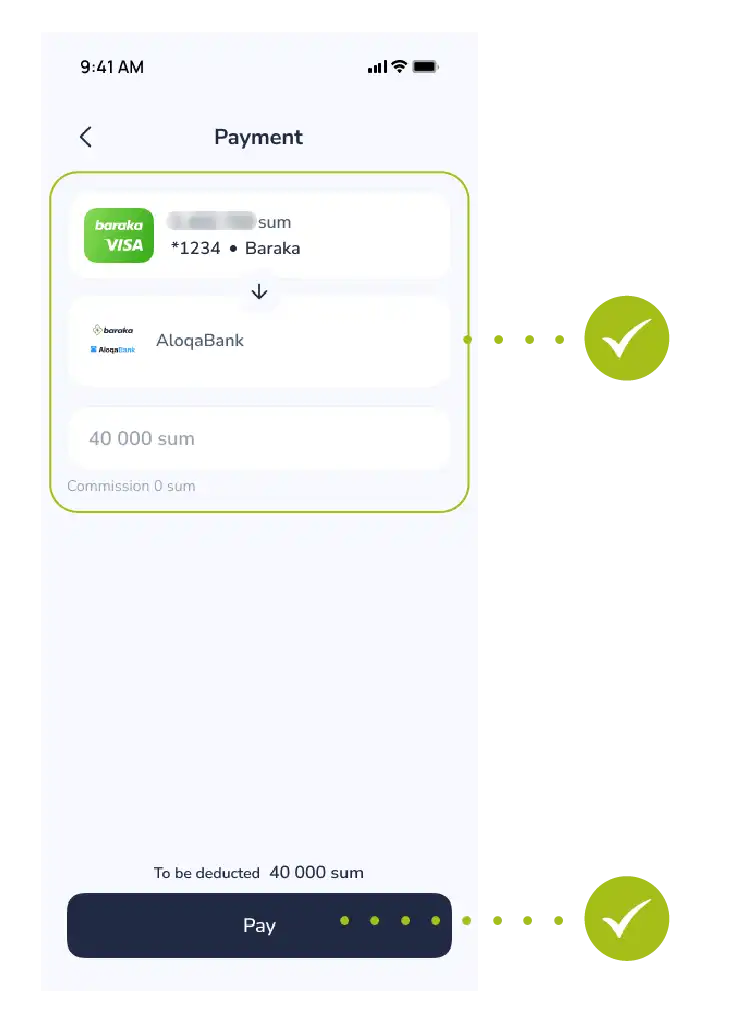
- A window showing the payment details and the service fee (40,000 UZS) will open within the app. Simply press the “Pay” button to complete the transaction.
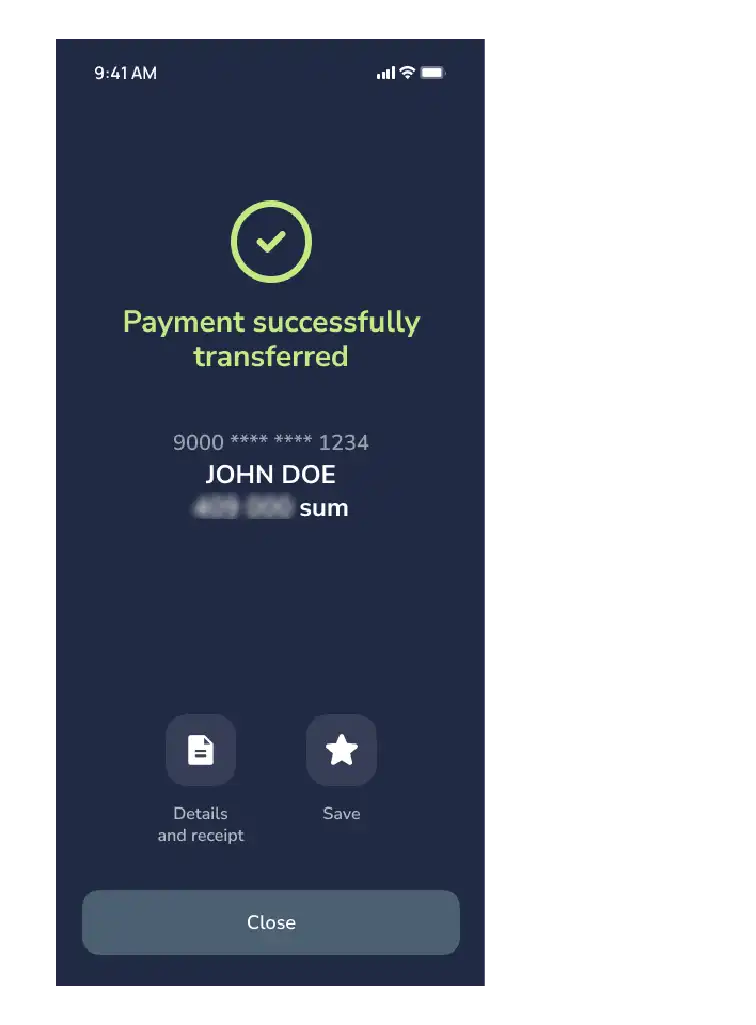
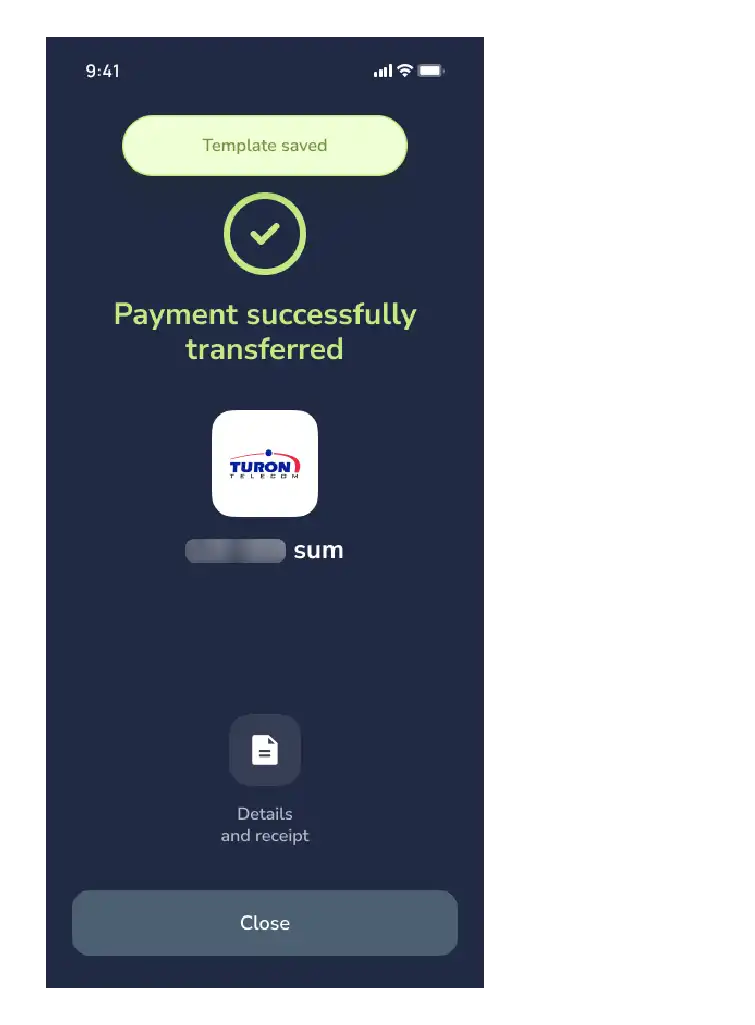
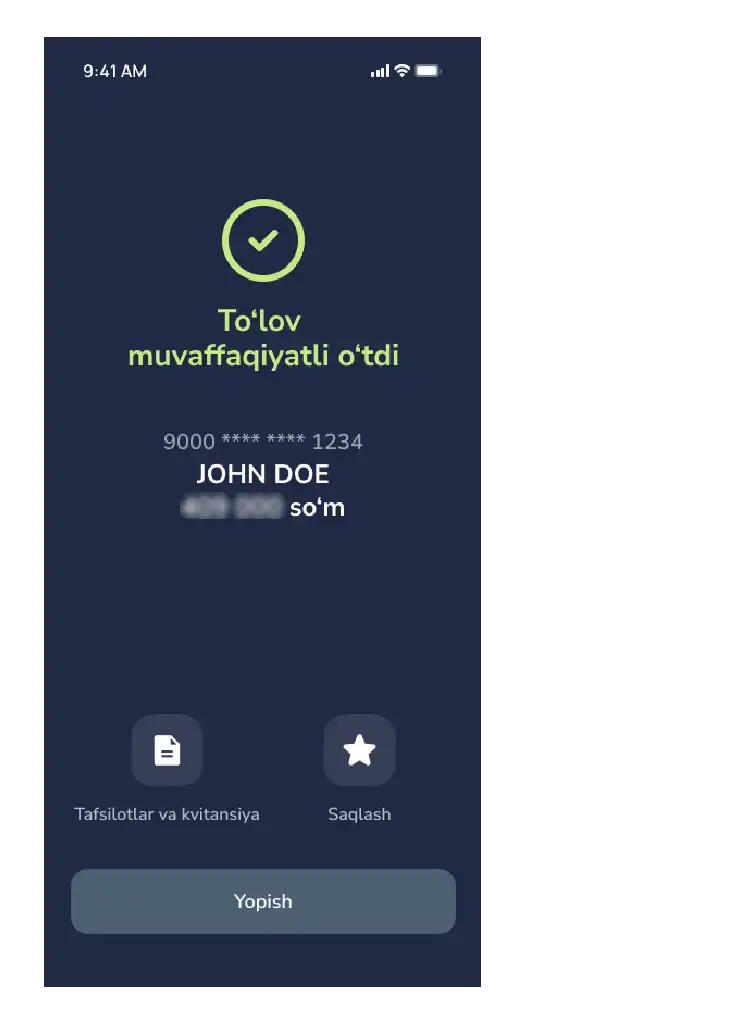
Step 8: Successful Payment Status
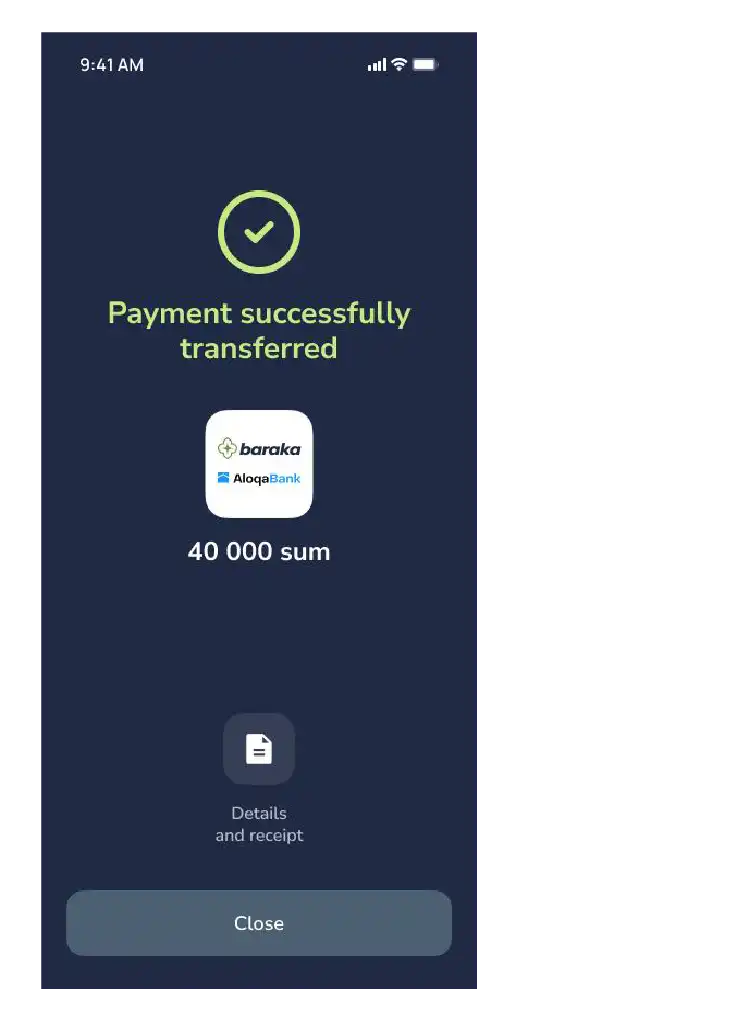
- Once the payment is successfully completed, a “Payment successful” message will appear on the screen along with a green checkmark. Here you can:
- Download the payment receipt via the “Details and Receipt” button;
- Press the “Close” button to move on to tracking the card preparation progress.
- Notification: Once the bank issues (completes) your card, a notification will be sent to your registered phone number or via the app.
After that, you can visit the selected branch and collect your card.
This manual explains the procedure for secure access to the user’s personal account. The login process is carried out using a registered phone number and a private password, protected by a one-time password (OTP) to ensure an additional layer of security. By following the steps outlined below, you can access the system features and the personal data management section.
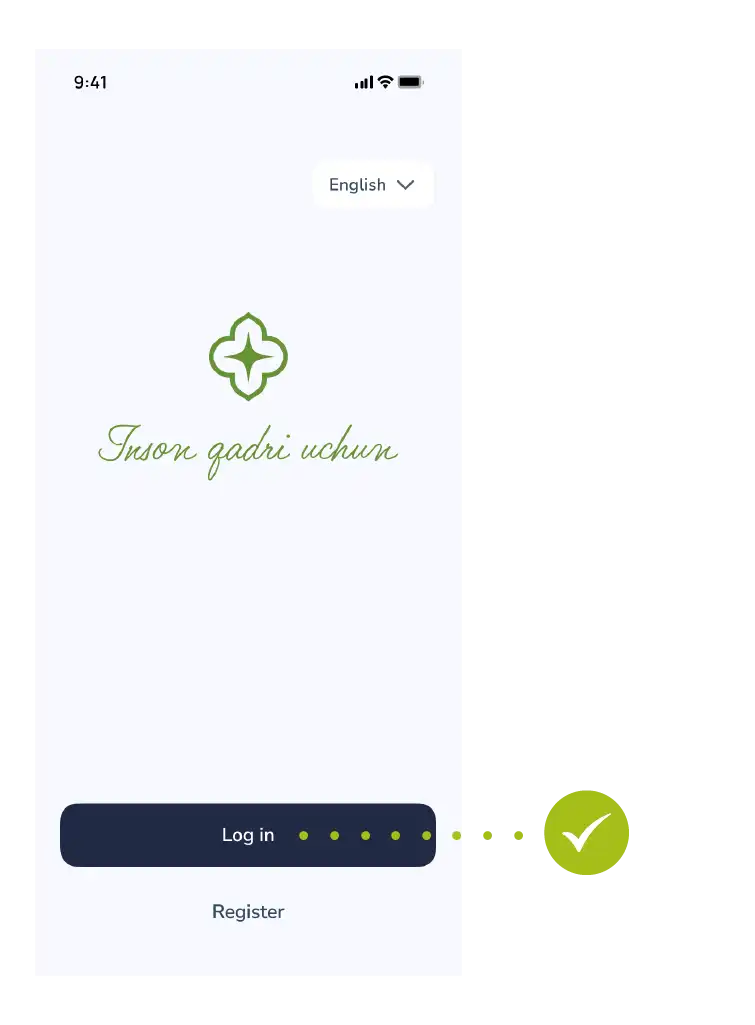
Step 1: Sign in
- Tap “Login” in the main menu.
Step 2: Enter your phone number
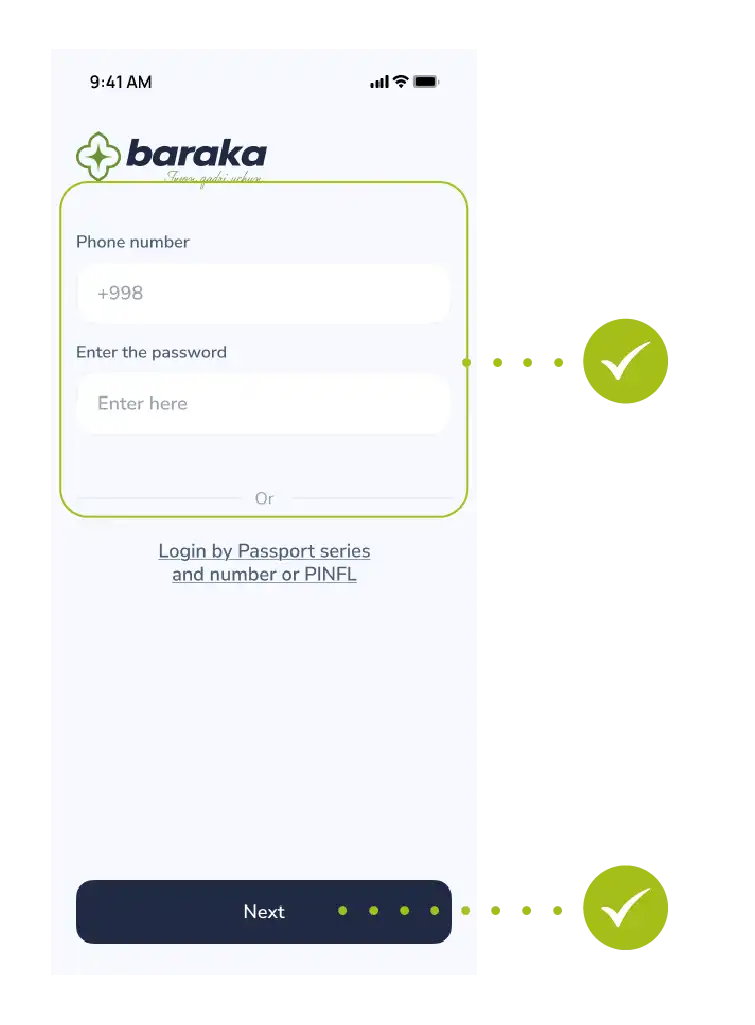
- Enter your registered phone number.
- Enter your password.
- Tap the “Next” button to proceed.
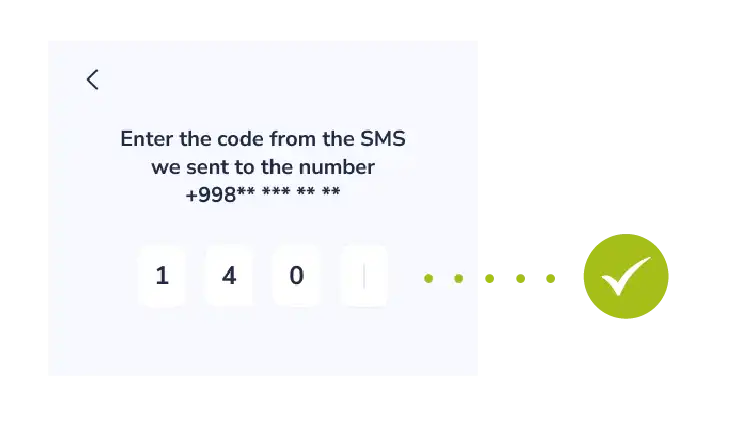
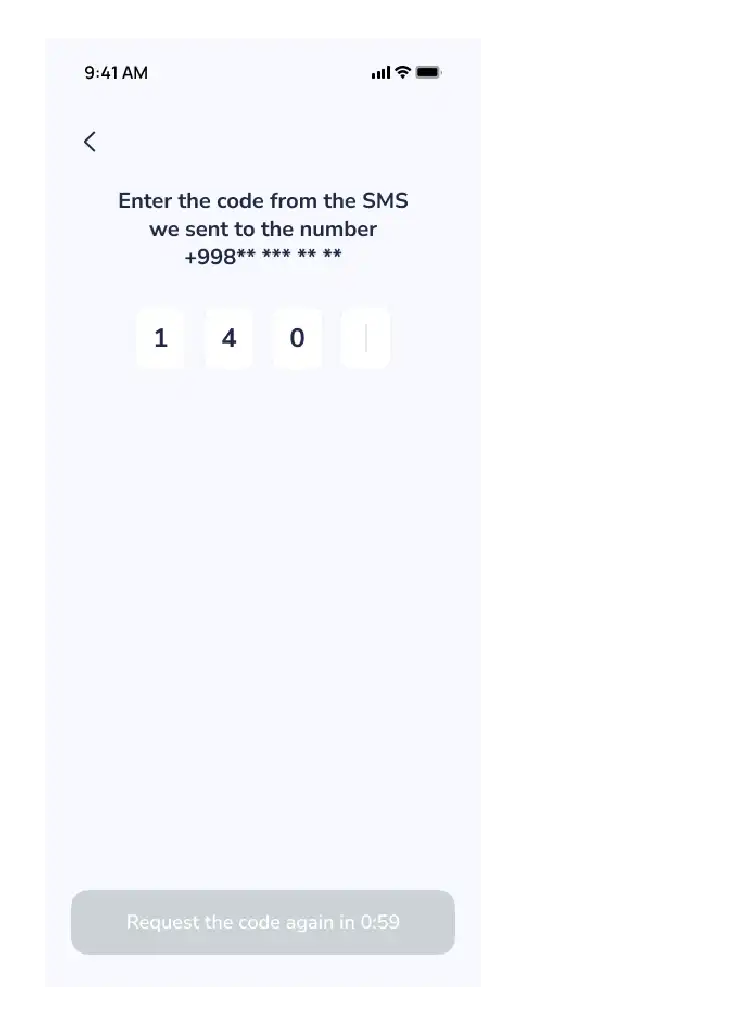
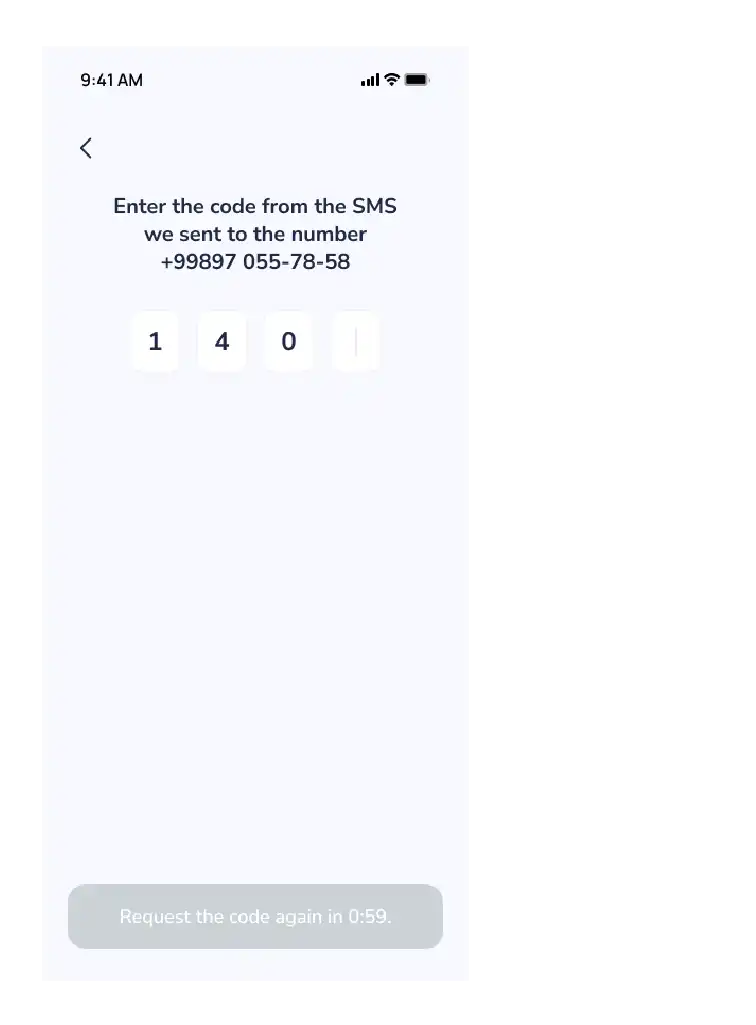
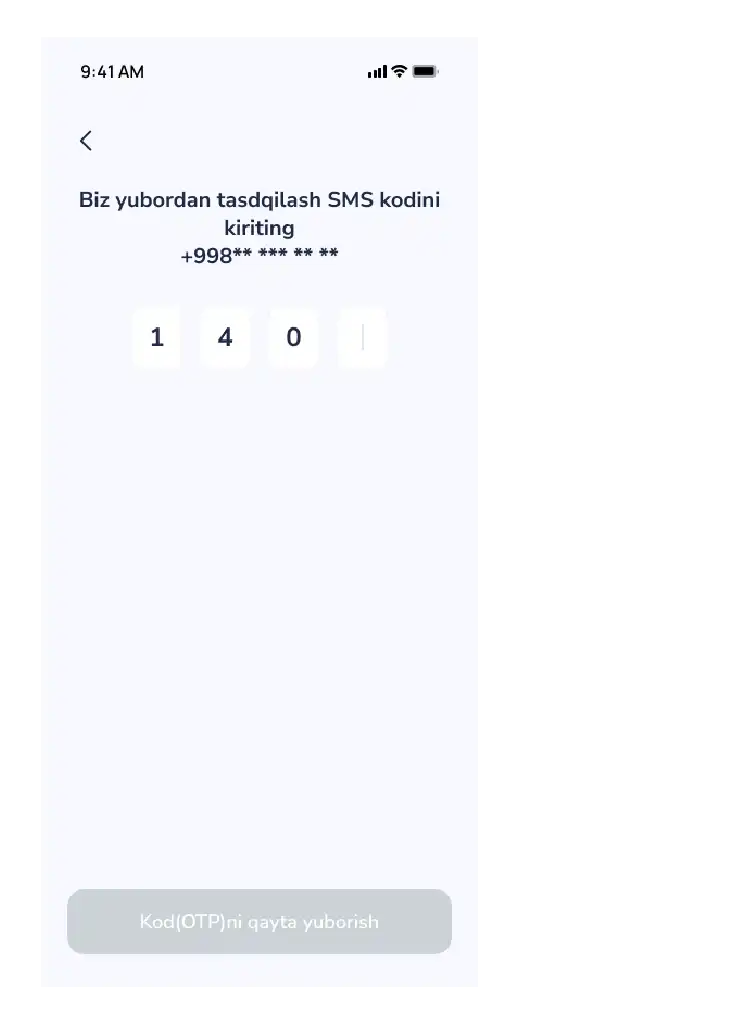
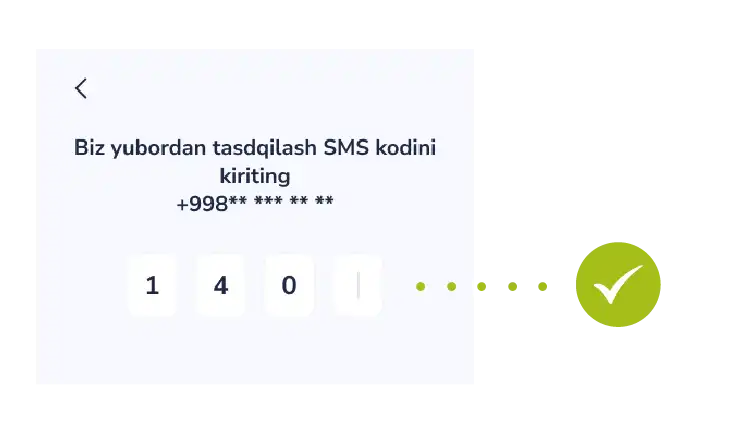
Step 3: Enter SMS code
- Confirm your login by entering the one-time OTP code sent to your phone.
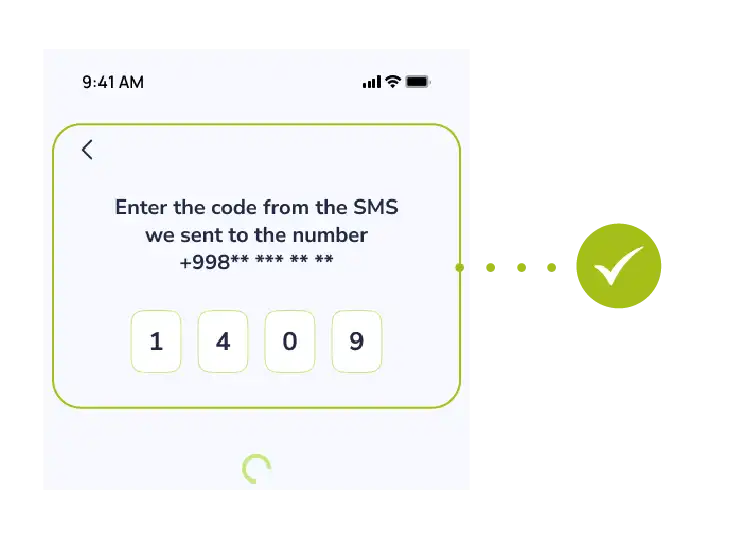
Success! You have successfully logged into the system and can now access your personal account.
 Second method